We can help you set up Posteo on your Windows Phone 8.
Visual instructions
Written instructions for setting up email
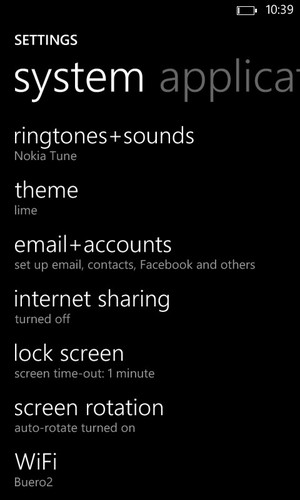
- First, open “Settings”.
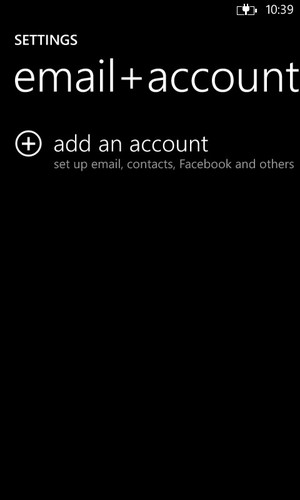
- Choose “email+accounts”.
- Tap “add an account”.
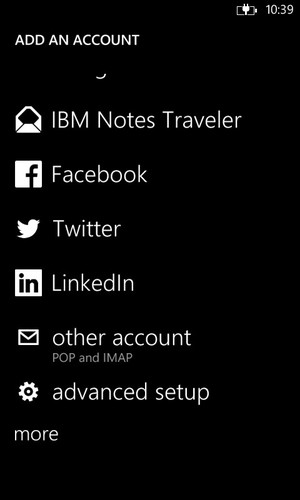
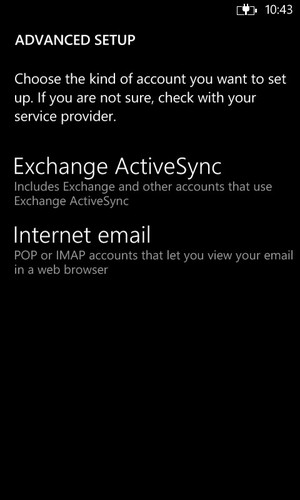
- Choose “advanced setup”.
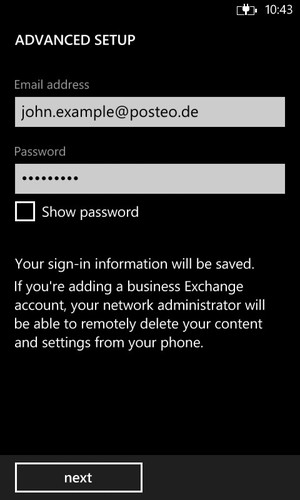
- Enter your Posteo email address and password. Tap “next”.
- Select “Internet email”.
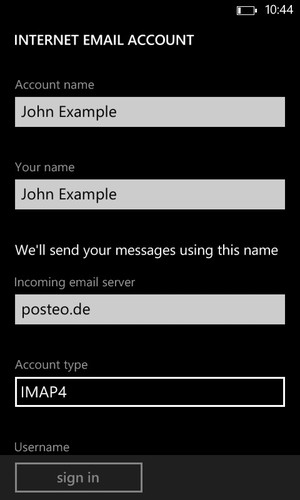
- Enter an account name and your name. For “Incoming email server”, enter “posteo.de”. For “Account type”, select “IMAP4”.
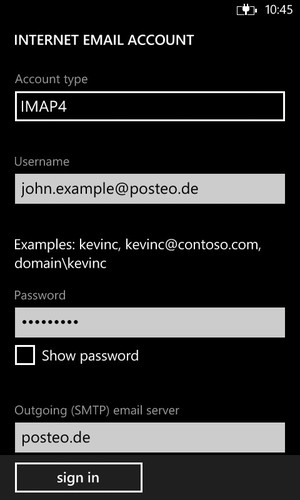
- In the username field, enter your complete email address, and in the field below, your password. Please enter “posteo.de” for the Outgoing (SMTP) mail server.
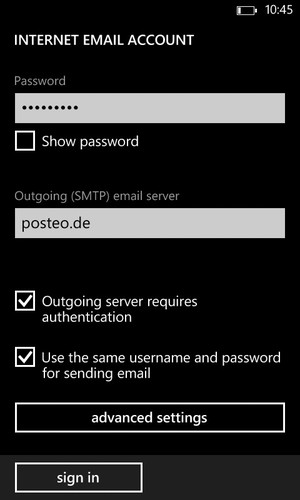
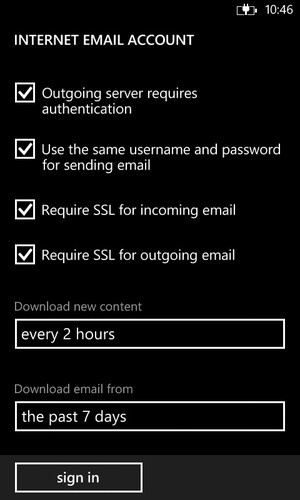
- Tap “advanced settings” and place ticks next to “Require SSL for incoming email” as well as “Require SSL for outgoing email”. Select how often messages should be downloaded and from which time period. Tap “sign in”.
- Your Posteo account is now set up.
Finishing up
Send an email from your Windows Phone. This is then stored in the “Sent Items” folder, which contains emails sent from your Windows phone.
So that you can also see emails sent from your Windows phone within your webmail as well as other email programs, the folders need to be combined.
In Posteo webmail, click “Settings” > “Folders” and place a tick next to “Sent Items”.
Setting up email, calendar and contacts (advanced)
Unfortunately, CardDAV and CalDAV do not function with Windows Phone 8. There is, however, a way you can synchronise your calendar and contacts. Synchronisation of appointments works fine, but for contacts it only works from Posteo to Windows Phone and not in the other direction. The setup is extensive and we can not guarantee that this method will continue to work with future updates from Microsoft.
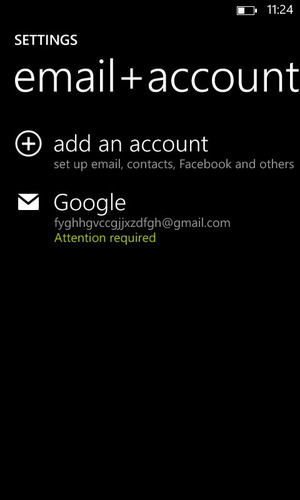
- First, open “Settings”.
- Choose “email+accounts”.
- Tap “add an account”.
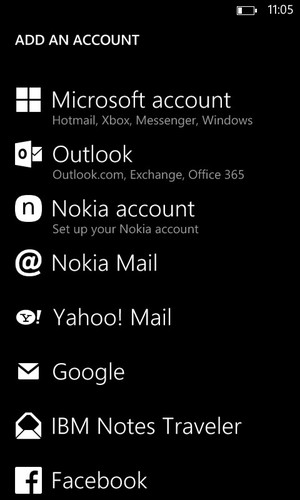
- Select “Google”.
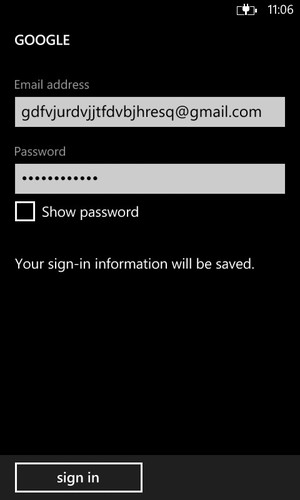
- Insert a fictitious gmail address, as well as an arbitrary password.
Please use a false email address. The important thing is that the fake address ends in @gmail.com.
Tap “sign in”
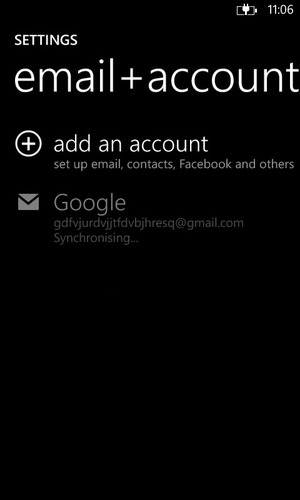
The phone will now try – without success – to connect with the Google account. After a while the message “Attention required” will appear. At this point, put the phone into airplane mode and then turn it off completely. - Turn the phone back on and go to “Settings” > “email+accounts”. Select the Google account.
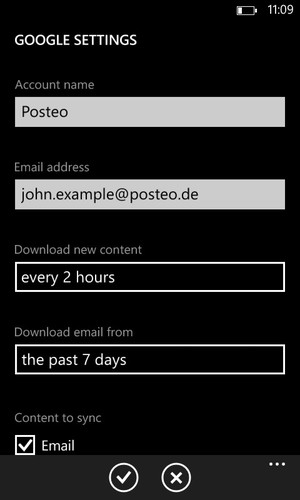
- Insert a username and your Posteo email address. Choose how often data should be downloaded and from which time period.
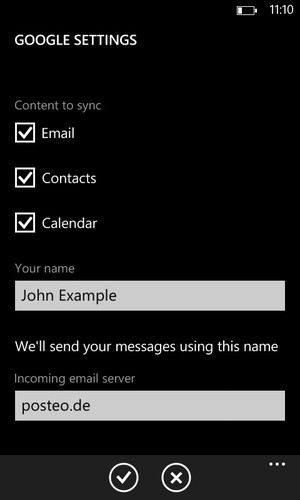
- Insert your sender name and for “Incoming email server”, “posteo.de”.
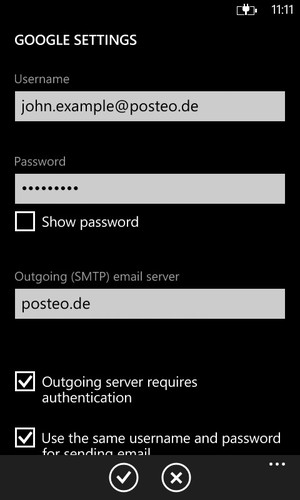
- For “Username” please insert your full email address, and in the field below, your password. For “Outgoing email server”, enter “posteo.de”.
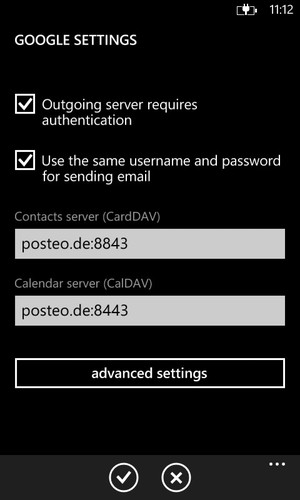
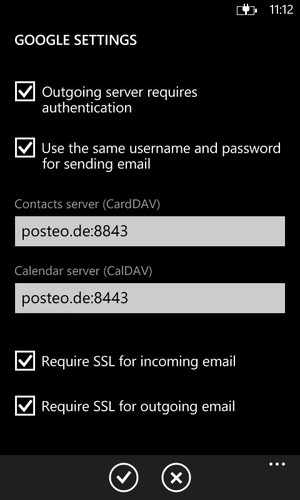
- For “Contacts server” enter “posteo.de:8843” and for “Calendar server” “posteo.de:8443”. Tap “advanced settings”.
- Place ticks next to both “Require SSL for incoming/outgoing email” if they are not already ticked. Press the circular tick symbol (at the bottom) to complete set up.
Visual instructions: Setting up email, calendar and contacts
Windows Phone 8.1:
The method described here works, but instead of “Google”, you need to choose “iCloud” and accordingly proceed with a fictitious iCloud email address in order to facilitate setup.

 Deutsch