Instructions
Before we begin, Windows Live Mail does not support aliases, nor does it allow correct naming of folders when using IMAP. Because of this, we do not recommend using Windows Live Mail. Use other email programs instead, such as Thunderbird
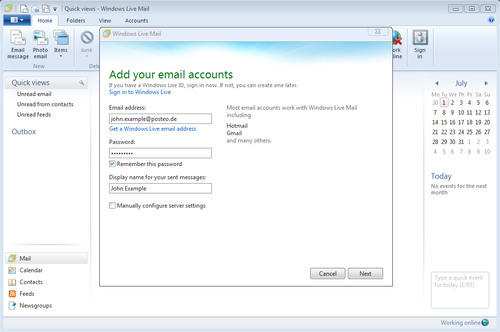
- To use your Posteo account, start the setup assistant for new emails via “Accounts” → “Email”.
- Enter your Posteo email address, password and your desired sender name, and click “Next”.
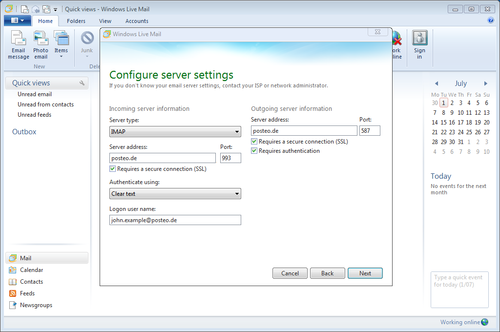
- For the server type, choose “IMAP”. Enter posteo.de as the address and place a tick next to “Require secure connection (SSL)”. The port will then change automatically to the correct value, “993”.
- Change the “Logon user name”, making it your full email address.
- For sending server, please enter “posteo.de” again, and place a tick next to “Require secure connection (SSL)” and “Require authentication”. Change the port to “587”.
- That’s all – click “Next” and then “Finish”.
- Now please also go through the finishing steps below.
Finishing up
Windows Live Mail sets its own folders for sent and deleted emails, generating them itself. This needs to be corrected, so that you only have the one folder for sent and deleted mails across both Windows Live Mail and webmail.
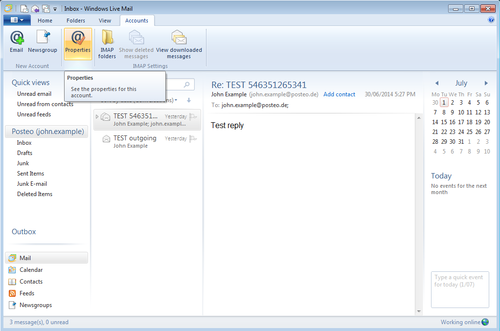
- In the menu, please click “Accounts”. On the left, select your account by clicking it, and then click in the menu on “Properties”.
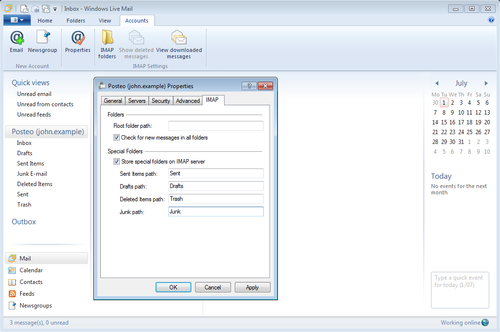
- Insert the following titles for the folder paths in the “IMAP” map: “Sent items” as “Sent”, “Drafts” remains “Drafts”, and “Deleted items” as “Trash”. Posteo has no junk folder, but you should create one in any case (named “Junk”), as the program requires it. Click “OK”.
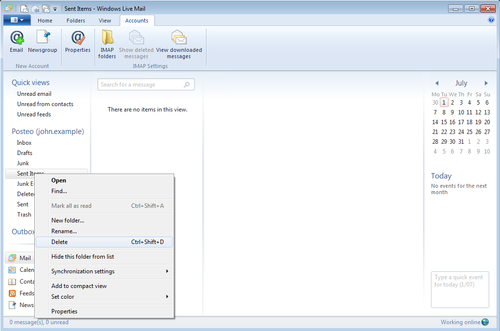
- To finish, you need to delete the folders that were automatically set up by Live Mail. Right-click the folders “Sent Items”, “Deleted Items” and “Junk E-mail” one after the other and delete them.
Aliases
Using aliases is not possible in Windows Live Mail.

