In this help article, you will learn how to create an appointment in the Posteo webmail calendar.
How to create an appointment in Posteo webmail
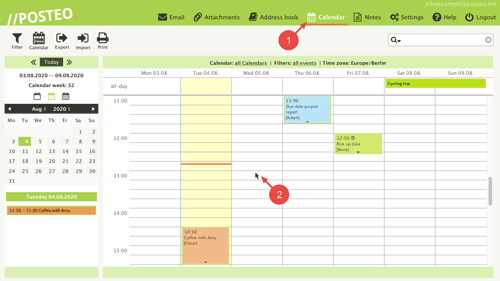
- Open your Posteo Calendar.
- Click on the desired location in the calendar.
The selected time range is automatically applied. If you want to create an all-day appointment, click the all-day line.
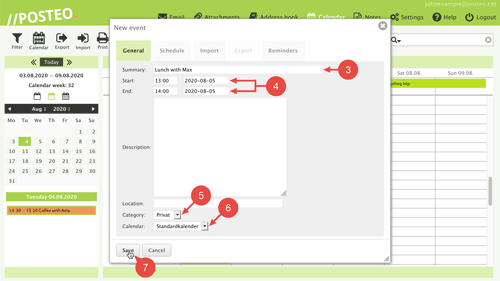
An input form will now open for your appointment entry.
- In the field Summary, enter your appointment.
- Set a start time and end time.
Tip: You can already select the start of the appointment with the click in Step 2. Drag and hold the mouse button to the desired end of the appointment to set the duration. - If needed, select an appointment category.
The category determines in which color the appointment is displayed. If you do not select a category, the appointment is green. - In the field Calendar, select the calendar in which you want to save the appointment.
- Click on Save.
Done. You have created an appointment. If you want, you can add more information like a location or receive a reminder for the appointment.
If you synchronize your calendar with a smartphone or email client, the new appointment will also appear on your devices after the next synchronization.


