If you would like to encrypt and decrypt your emails with OpenPGP, you can do this directly in Thunderbird. This requires the add-on “Enigmail”. Enigmail helps you set up key pairs. The plug-in simultaneously checks whether a recipient can decrypt your emails or not.
In this help article we explain how to install Enigmail, how to generate and use an OpenPGP key for your email address.
Installing Enigmail
If you already know how to install an add-on in Thunderbird, you can skip this section.
- Open Thunderbird.
- Click the sandwich button in the menu at the top right and then click Add-ons.
- Enter “Enigmail” in the search field and confirm with the Enter key.
- Next to the entry for Enigmail, click Install.
- Once installation is complete, you need to restart Thunderbird by clicking Restart.
In case of problems with the installation, read our help article How do I install a Thunderbird add-on?
Setting up Enigmail and generating an OpenPGP key pair
Enigmail offers a convenient wizard to help you setting up. The wizard opens automatically after installation of Enigmail. If you later need to open the wizard, click the sandwich button, then the “arrow” next to Enigmail and then Enigmail wizard.
For quick setup, use our visual instructions.
- In the first window of the wizard, choose Yes, I would like the wizard to get me started and click Continue.
- In the next window you need to determine how you would like to encrypt. Choose Convenient auto encryption and click Continue.
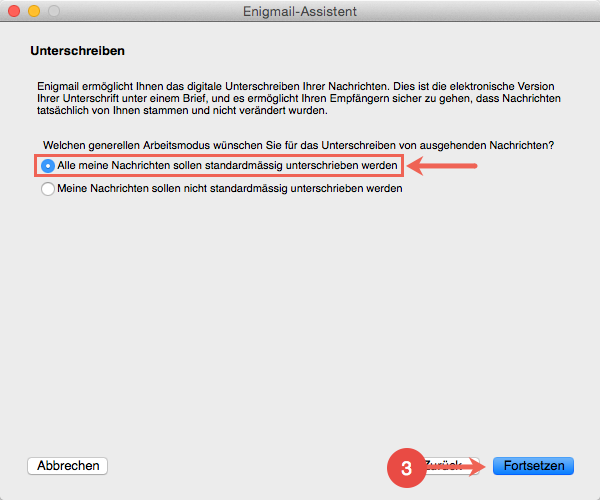
You can only encrypt an email if you know the recipient’s public key. When you choose the recommended setting, Enigmail automatically checks if you are in possession of the public key and decides itself whether encryption is possible or not. - In the next step, select Sign all of my messages by default and confirm with Continue.
The digital signature is an important part of the email encryption. You should always sign emails. Important: A digital signature is no replacement for encryption. - Select Yes and click Continue.
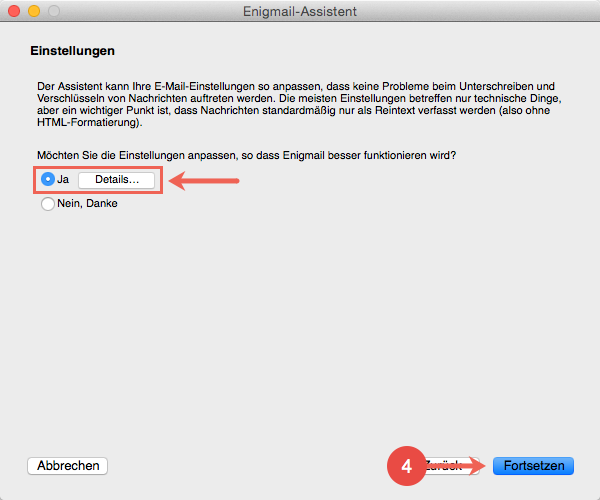
Formatted text (bold, various text sizes) are in many cases incompatible. You should therefore always send emails purely as text (without formatting). - Select I want to create a new key pair for signing and encrypting my email and confirm with Continue.
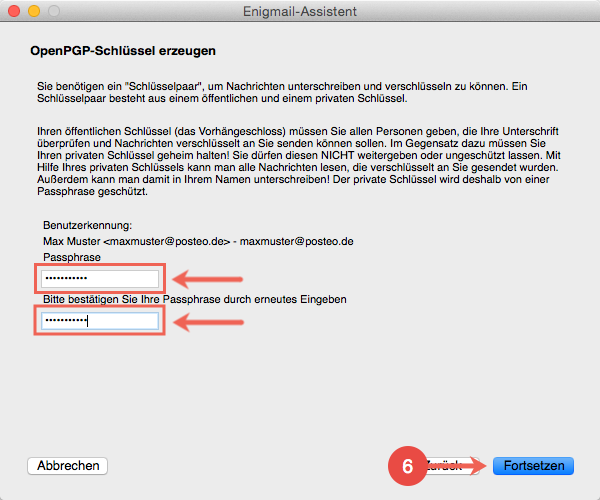
In this step, you will create your personal key pair. If you already possess a key, read our article How do I add a key to Enigmail? - Choose a passphrase and confirm it in the second field. Click Continue.
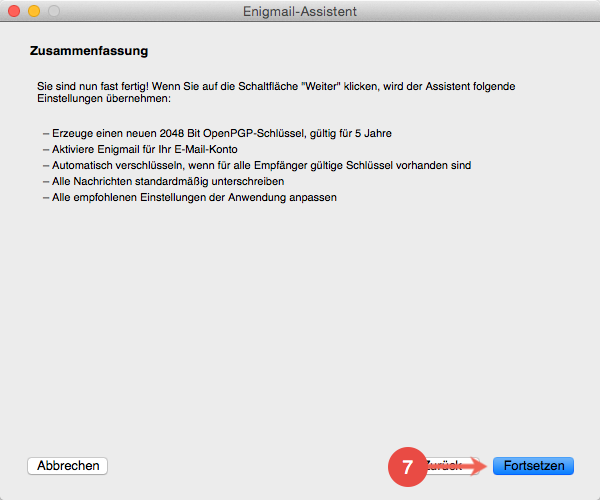
The passphrase protects your private key, with which you decrypt your emails. Never disclose this to anyone. - Read the summary and click Continue.
- After the key is created, you can also create a revocation certificate. Click Generate Certificate and save the file that is then created to your computer.
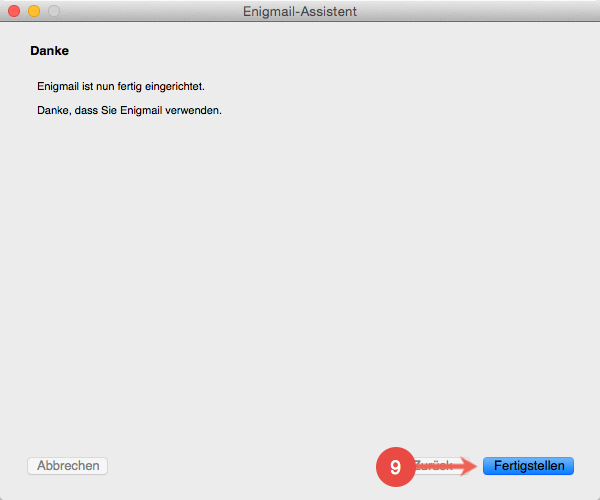
You can make your key invalid using the revocation certificate, if your private key is stolen. Therefore, look after it well. - By clicking Done, setup of email encryption with OpenPGP is complete.
Visual instructions: Setting up Enigmail


Initialising email encryption
After setting up Enigmail, your system is ready to encrypt emails. To begin with, however, you can neither send nor receive encrypted emails. The reason for this has to do with the functionality of the encryption itself:
- You can only encrypt emails if you know the recipient’s public key.
- You can only receive encrypted emails if the sender knows your public key.
The last step for sending and receiving encrypted email is therefore initialisation: Send your public key to your contacts.. To do this, proceed as follows:
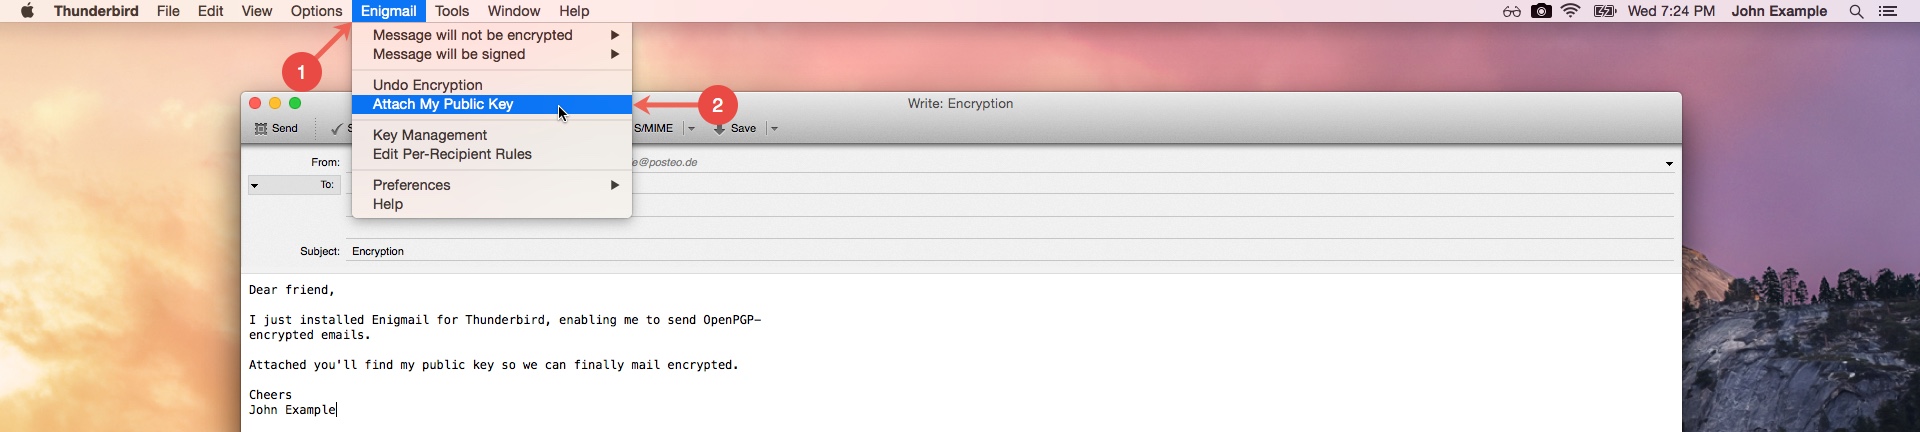
- Write a new email to a recipient with whom you would like to communicate encrypted.
- Before sending the email, click Enigmail in the menu and then Attach Public Key….
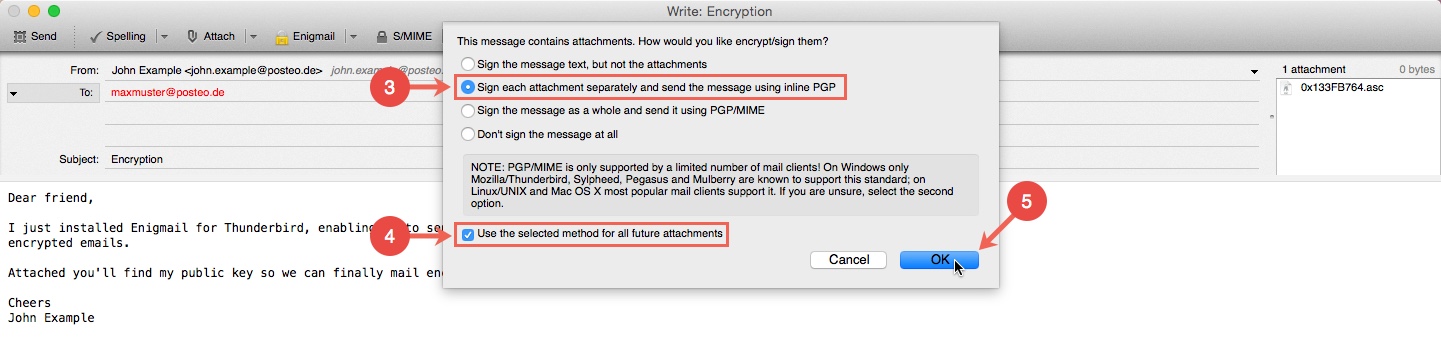
Now click Send. When sending your first email, you will need to define how you would like to encrypt attachments for future emails. We recommend using PGP/MIME. We also use this method for our Inbound Encryption
- Select Sign the message as a whole and send it using PGP/MIME.
- Place a tick next to Use the selected method for all future attachments.
- Confirm by clickingOK.
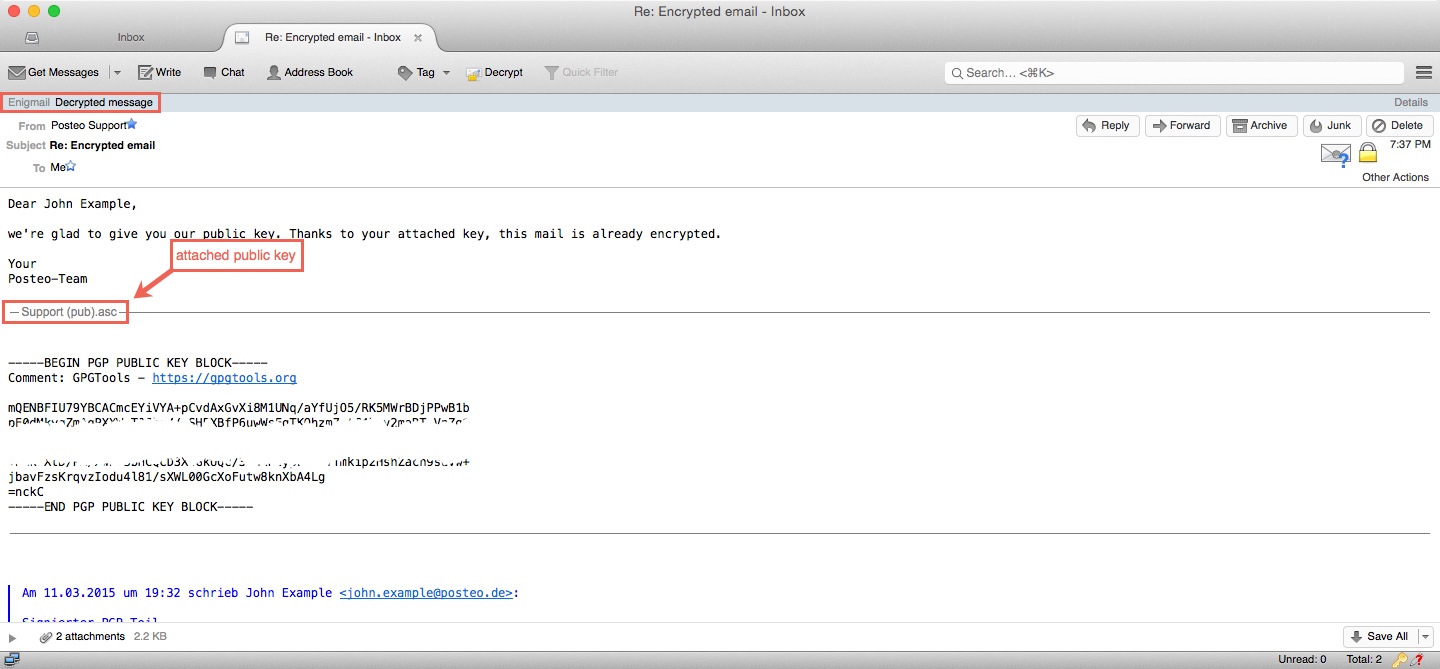
You have sent your public key. The recipient of the email can now send you encrypted emails. You can read how to send encrypted emails yourself in the next step.
Sending an encrypted email

To send someone an encrypted email, you will need the recipient’s public key. You can obtain this by asking the recipient to send it in advance. Tip: Always attach your public key to a request. The recipient can then answer you encrypted, straight away.
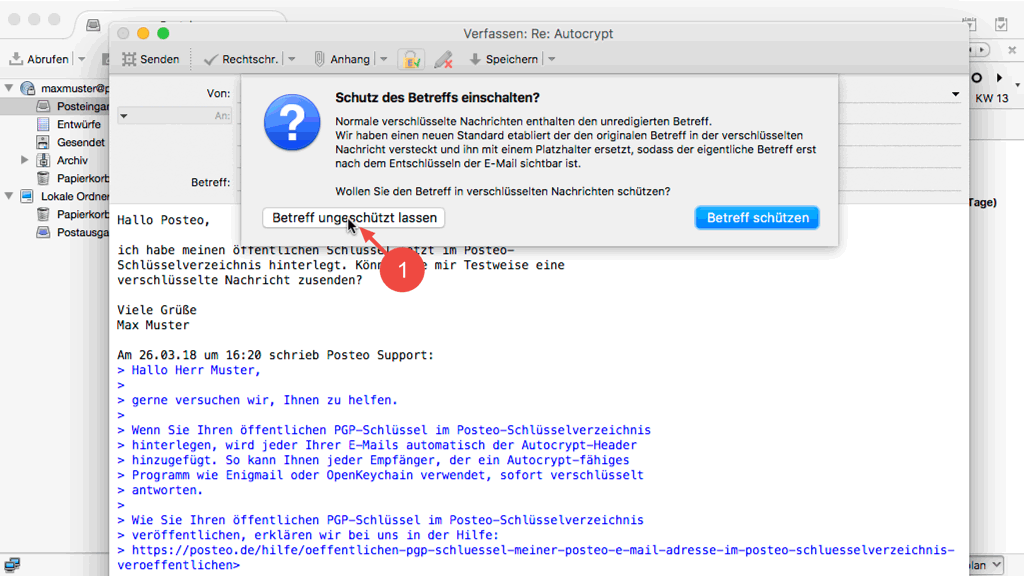
Leave subject unencrypted
Since the release of version 2.0, Enigmail offers an experimental feature to encrypt the subject of a message. Other email clients do not support this feature. Encrypted subjects cannot be read by many recipients. Because of this, we recommend that you do not activate subject encryption by default. When sending your first email, select Leave subject unprotected.
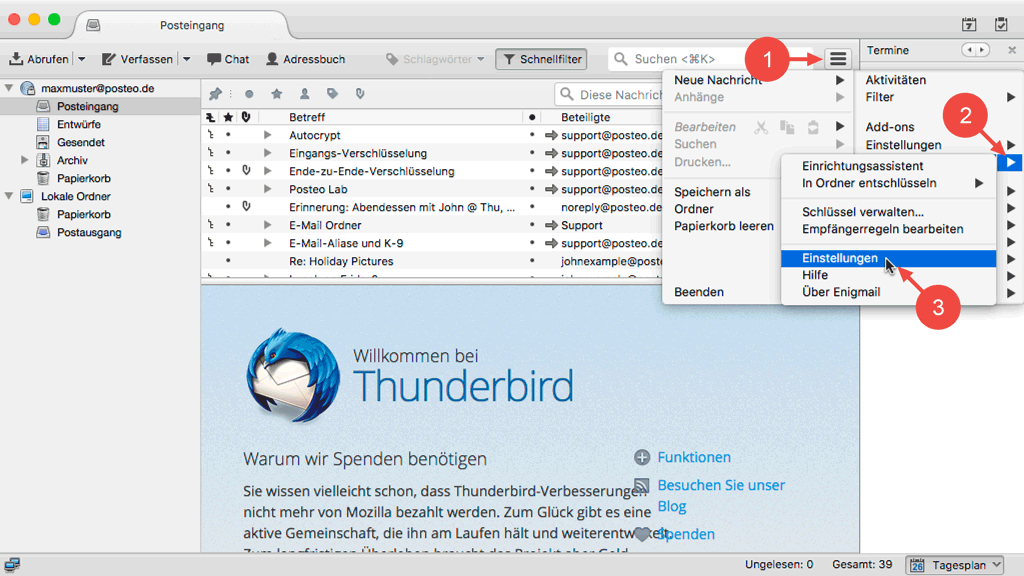
Have you already activated this feature? No problem. You can deactivate this option in Enigmail’s settings.
- Click on the sandwich button on the top right.
- Move your cursor onto the arrow next to Enigmail to open the next menu.
- Click on Settings.
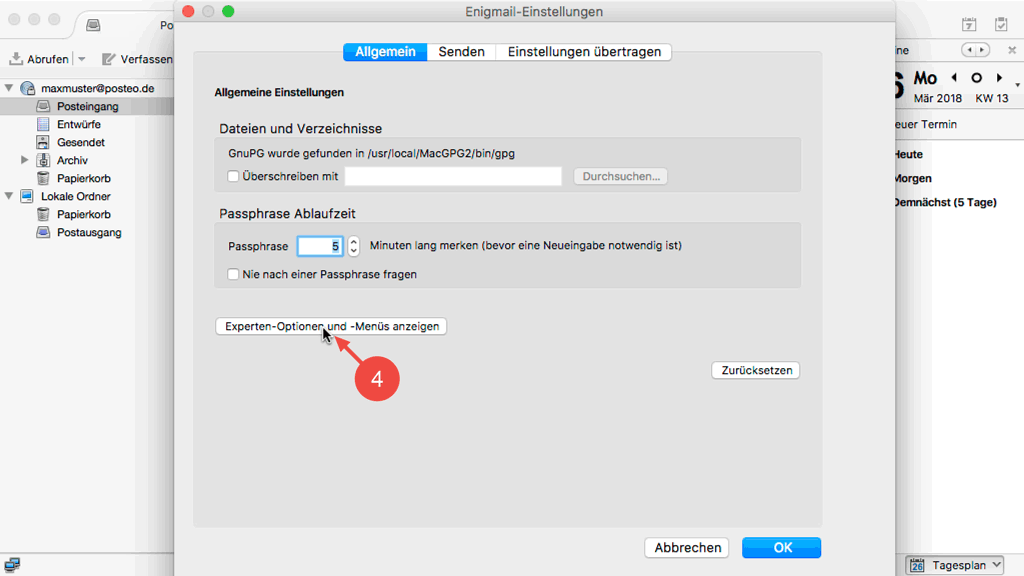
- Click the button Display Expert Settings and Menus.
- Click on Advanced.
- Remove the tick next to Encrypt subject by default (PGP/MIME encrypted message only).
- Confirm the changes by clicking on OK.

Safely store your key
When you use email encryption, only you have access to your emails using your private key. It is therefore important to always make a backup copy of your key pair. We explain how to export your key from Enigmail in our help article How do I export my OpenPGP key from Enigmail?