With Enigmail, emails are encrypted using your OpenPGP key. In this help article, we explain how to add an existing key pair in Enigmail. If you do not yet possess a key pair, please read our help article How do I encrypt emails using Enigmail and Thunderbird?
Adding a key
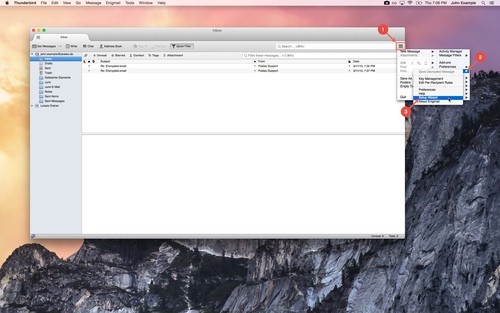
To add a key, you need to open the Enigmail wizard. Visual instructions can be found in the gallery under our Step-by-step instructions.
- Click the sandwich button, at the top right of the menu.
- Click the arrow next to “Enigmail”.
- Click Setup Wizard.
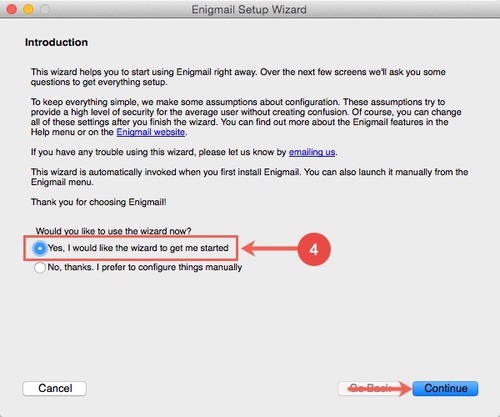
- In the first window of the wizard, select Yes, I would like the wizard to get me started and click Continue.
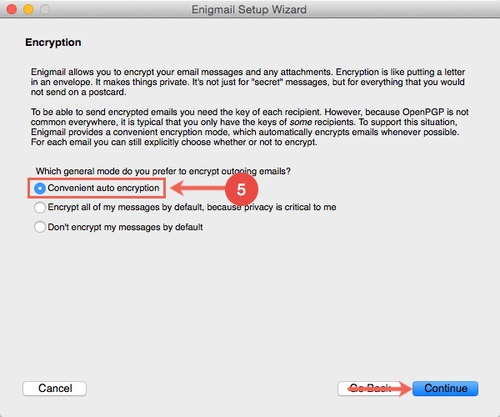
- In the next window you need to specify when you would like to encrypt. Choose Convenient auto encryption and click Continue.
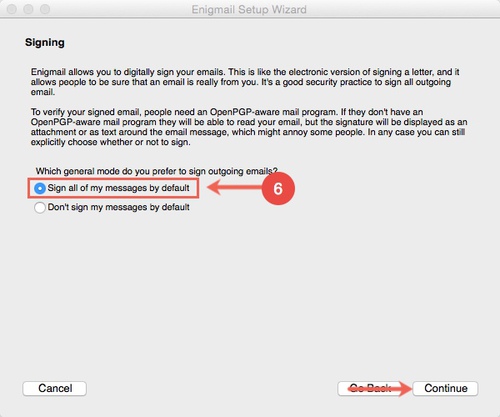
- Next, select Sign all of my messages by default and confirm with Continue.
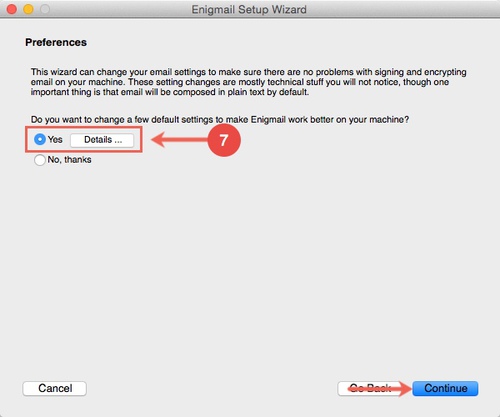
- Choose Yes and click Continue.
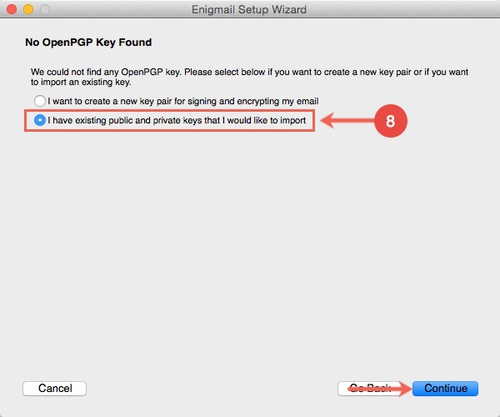
- Select I have existing public and private keys that I would like to import and click Continue.
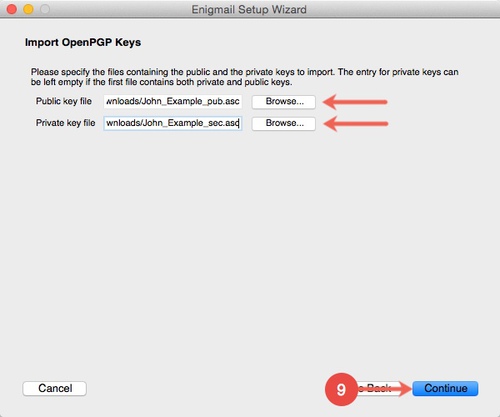
- Click the Browse button and paste first your public key and then your private key. Confirm by clicking Continue. You need to have exported your keys to a file beforehand. How to export a key from Enigmail is explained in our help article How do I export my OpenPGP key from Enigmail?
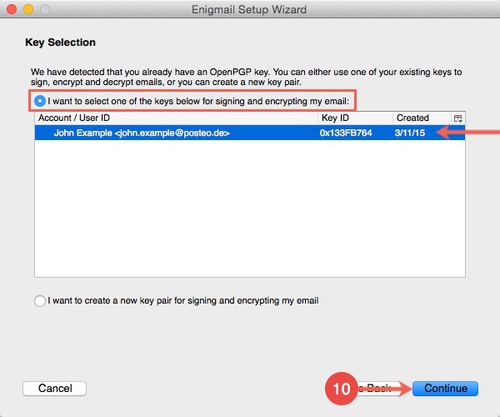
- Choose I want to select one of the keys below for signing and encrypting my email, click on the key you just imported and confirm with Continue.
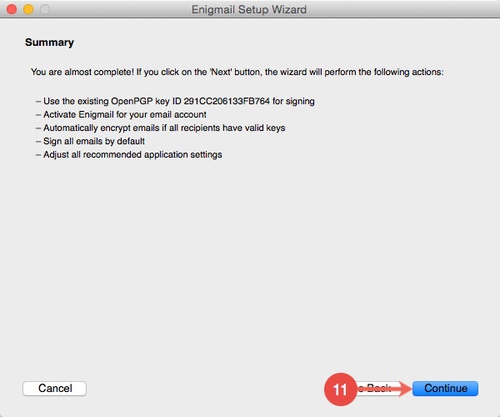
- Read the summary and click Continue.
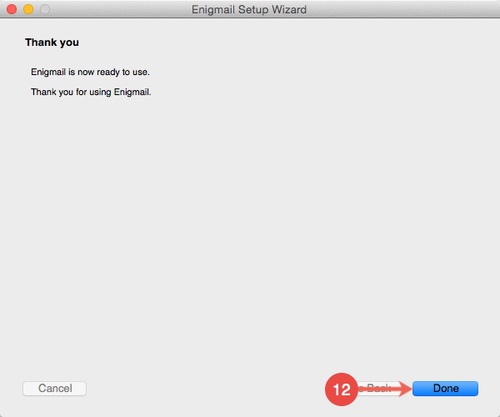
- By clicking Done, setup of email encryption using PGP is complete.
Visual instructions: Adding a key
Secure your key
When you use email encryption, only you have access to your emails using your private key. It is therefore important to always create a backup copy. How this works is explained in our Enigmail and Mailvelope help articles.

