You also want to use your Posteo address book and your Posteo calendar on your Android devices? This is possible with the open-source app Davx5 (Davdroid) among others.
In this help article you will learn how to install and set up this free app.
Contents
- Install Davx5
- Set up Posteo in Davx5
- Display Posteo contacts in Davx5
- Set Posteo as the default address book
- Create entries in the Posteo calendar
- Tips & Troubleshooting
- Related help articles
Install Davx5
If you’ve already installed Davx5 you can skip to Set up Posteo in Davx5.
Davx5 is a free open-source app that you can download and install from the app catalog F-Droid.
Davx5 can also be purchased from the Google Play Store.
How to set up Posteo in Davx5
Open Davx5 and follow these steps:
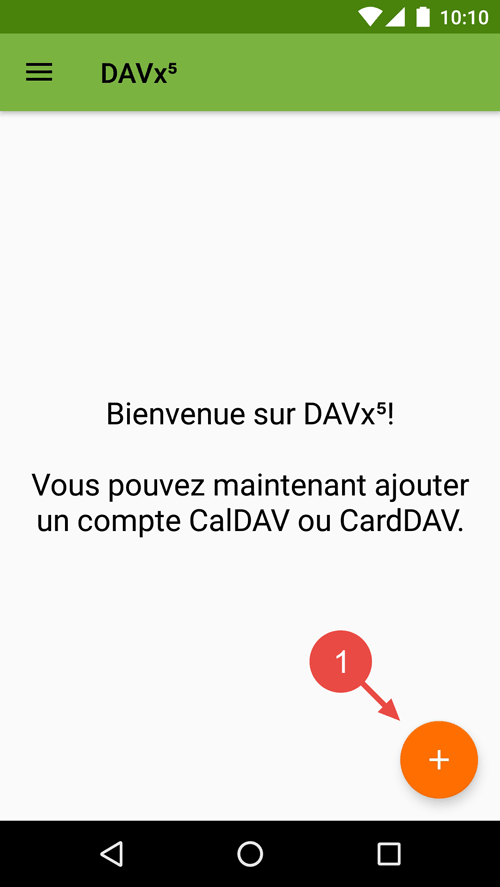
- Tap on the plus symbol on the bottom right.
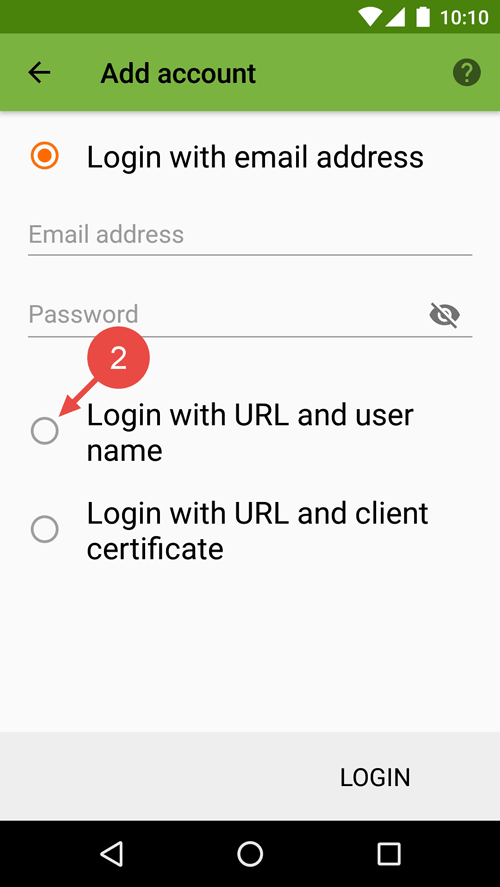
- Select “Login with URL and user name”.
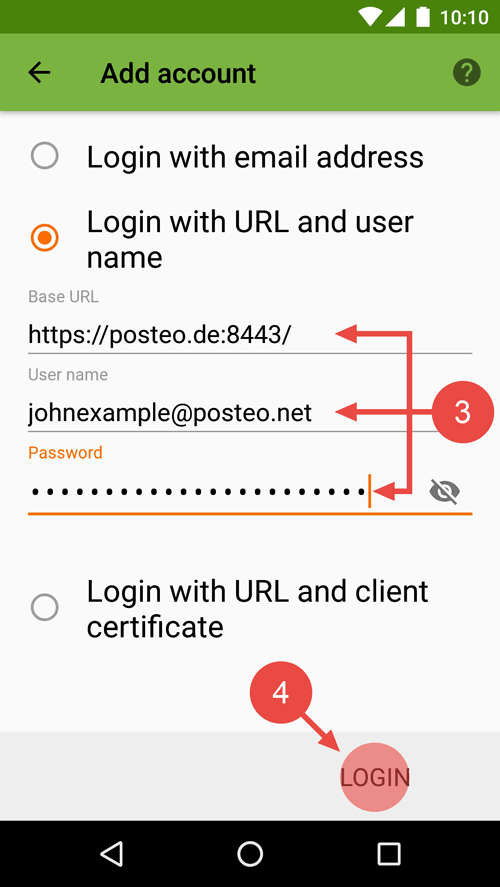
- Fill out the following three text boxes as follows:
- Base URL: https://posteo.de:8443/
- User name: Your Posteo email address
- Password: Your Posteo password
- Tap on Login.
Are you receiving an error message during setup? Please see our Tips & Troubleshooting. - Give your account a name like Posteo, for example.
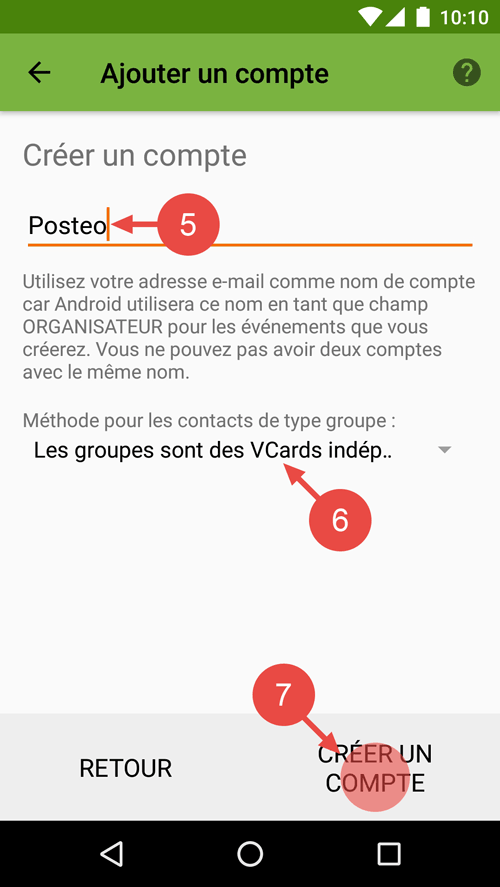
- Select the contact group method Groups are separate VCards.
Synchronisation of the group contacts feature in Posteo webmail is not possible.
- Tap on Create account.
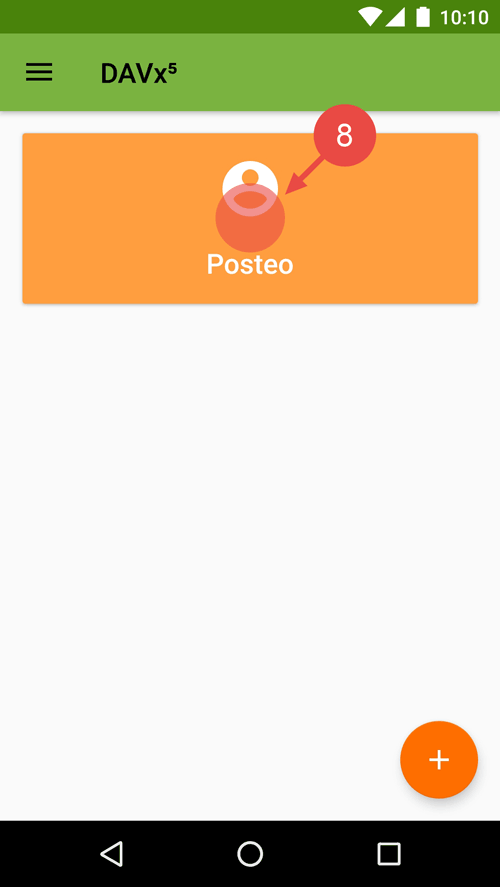
- Tap on the Posteo account named, for example, Posteo in Davx5.
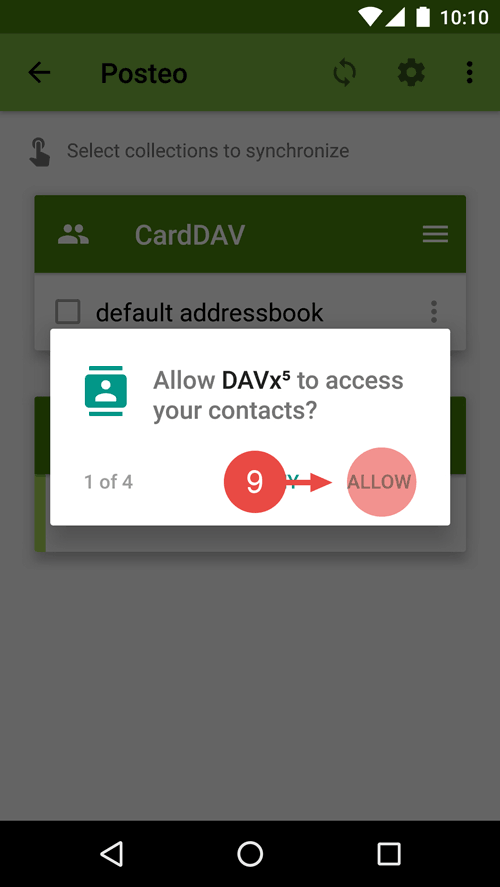
- Allow Davx5 to access your contacts and calendars by tapping on Allow. You can also allow access to Tasks.
You can synchronise CalDAV tasks with other devices through Davx5. It is not possible to display tasks in Posteo webmail.
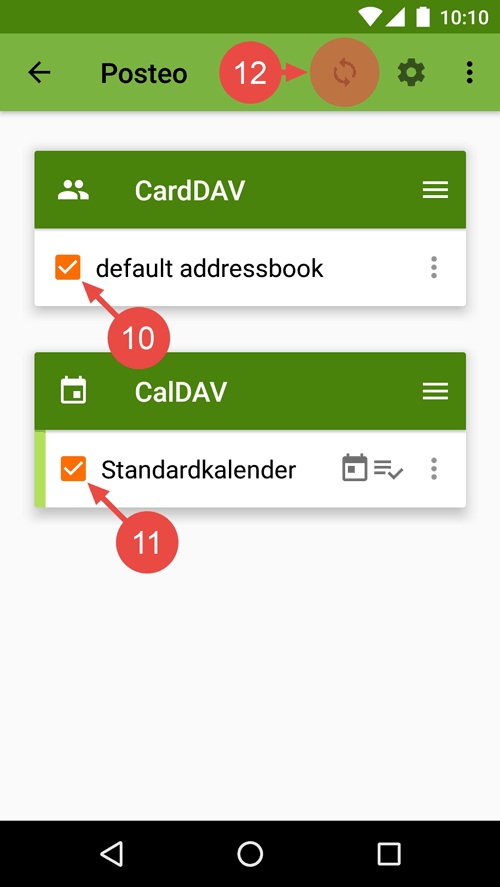
- Tick the box next to default addressbook.
- Tick the box next to the calendars you would like to synchronise, for example the Standardkalender.
- Begin the first sync by tapping on the Synchronise symbol.
That’s it! You have just set up the synchronisation of the Posteo address book and calendar with Davx5.
How to display your Posteo contacts
Have you used a local address book, a Gmail address book or one from another provider up until now? If so, the Android address book will first display the address book that has been used up until this point. To display your Posteo contacts, follow these steps:
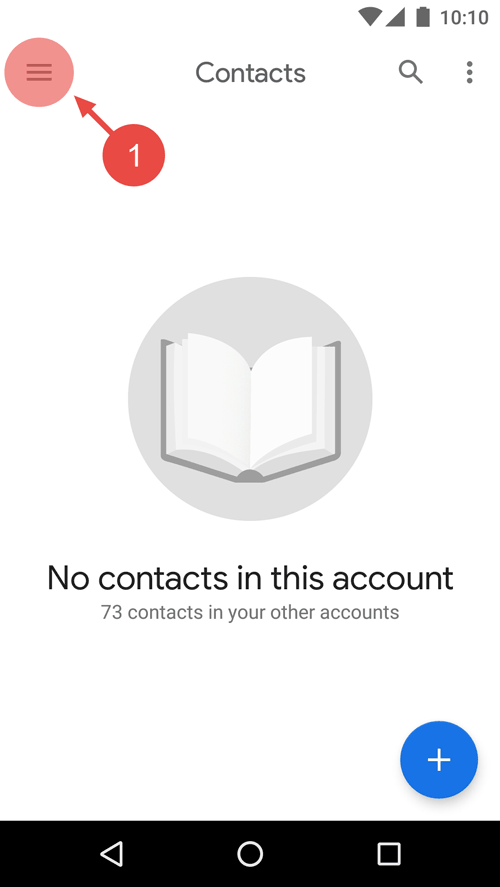
- Tap on the Sandwich menu on the upper left.
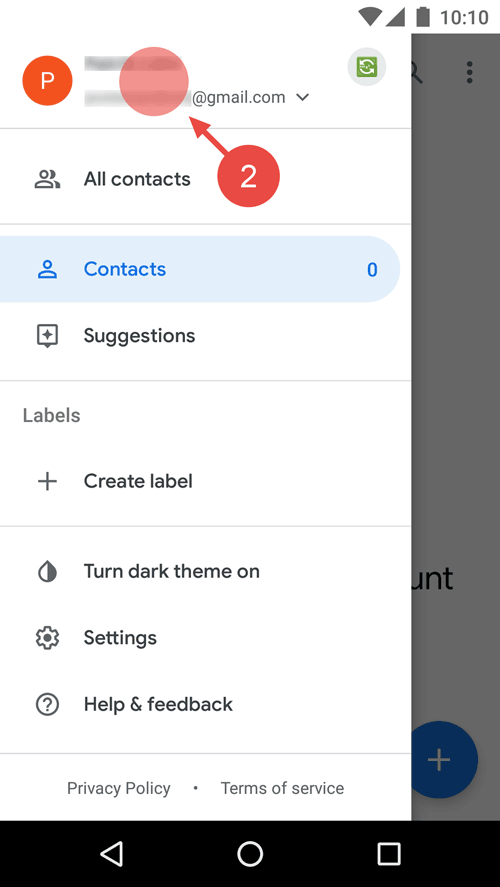
- Tap on the account name of the account you’ve used up until now (e.g. Gmail).
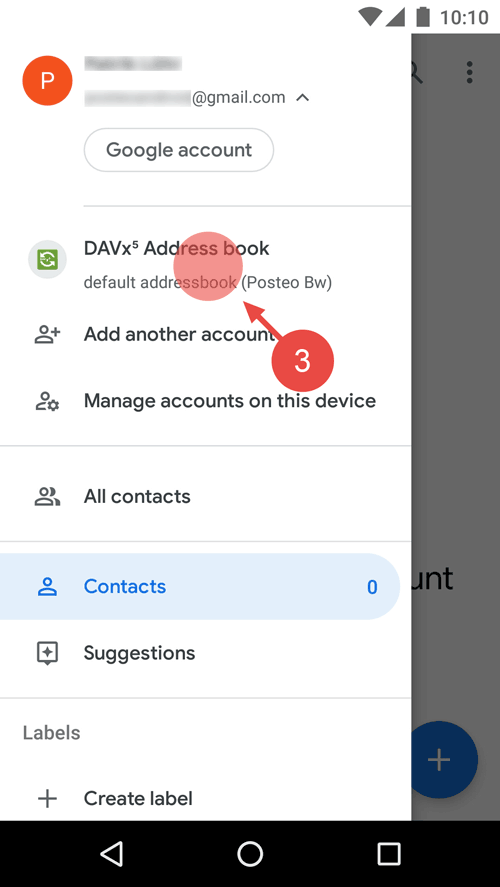
- Select Davx5 Address Book.
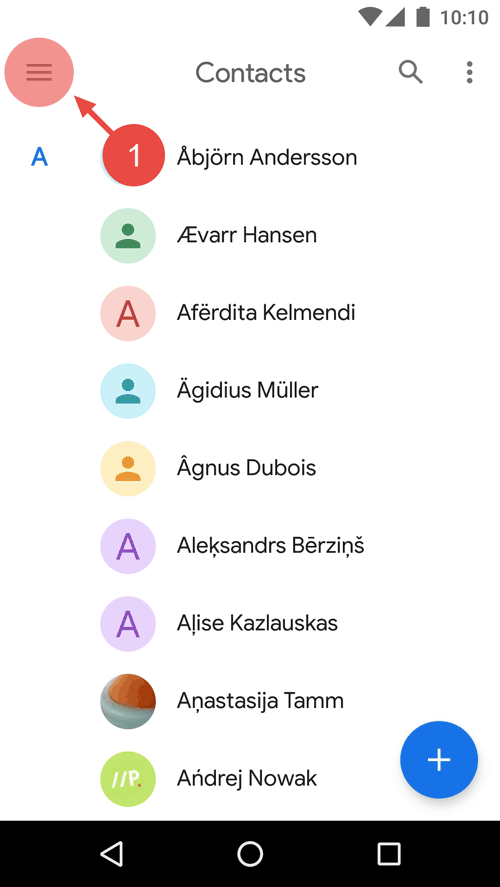
That’s it! The Android address book app will now display your Posteo contacts.
How to make your Posteo address book the default account for contacts
You would like to automatically save contacts that you have created on your Android smartphone at Posteo? To do so, simply make Posteo the default address book for Android:
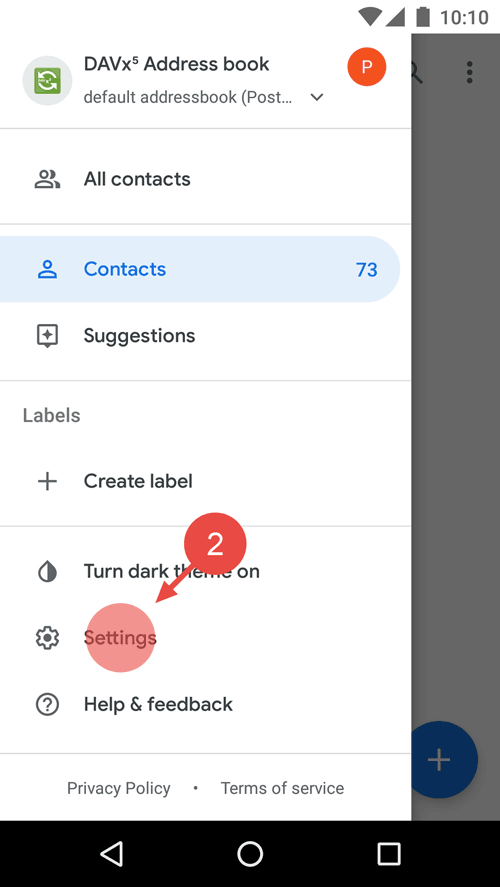
- Tap on the Sandwich menu in the upper left.
- Open Settings.
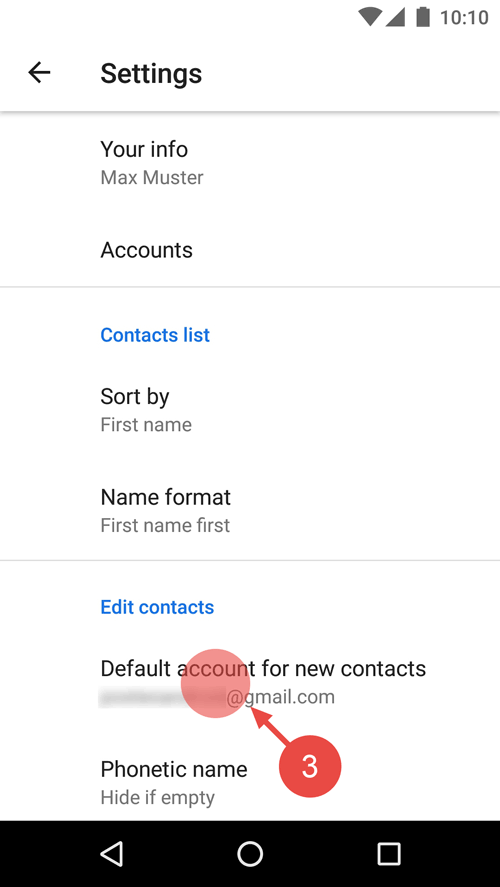
- Tap on Default account for new addresses.
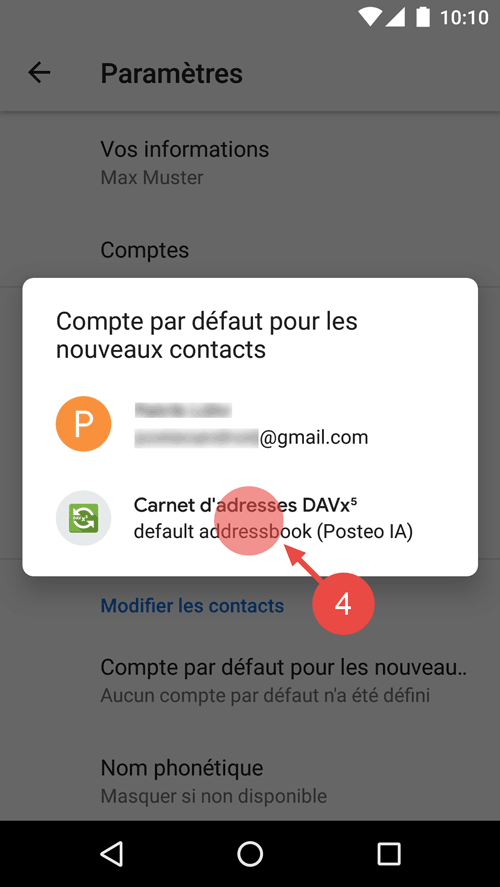
- Select Davx5 Address book.
That’s it! Your Posteo address book is now the default address book on your Android smartphone.
How to create entries in the Posteo calendar
You have used a local calendar, a Gmail calendar or a calendar from another provider up until now? The Android calendar app remembers which calendar you last used to save when creating an entry.
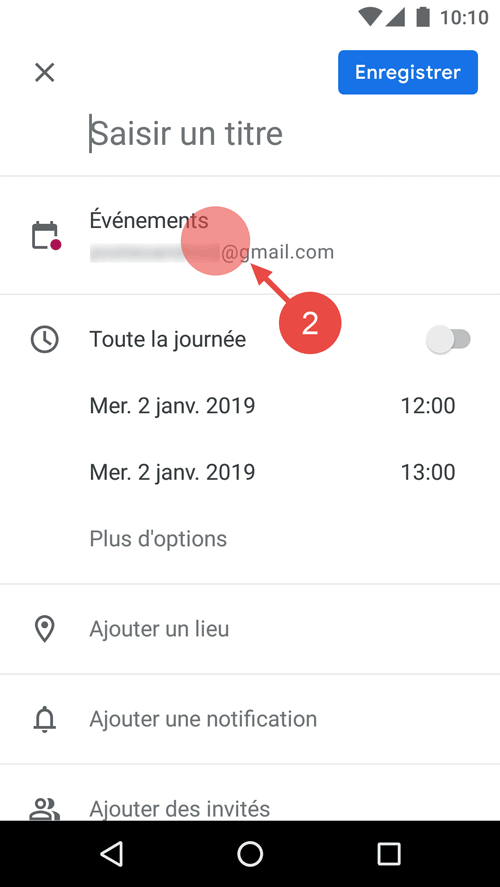
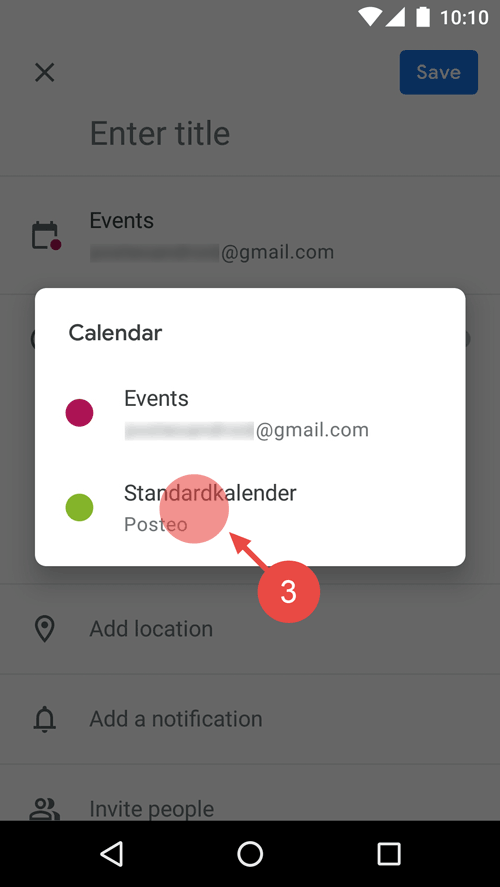
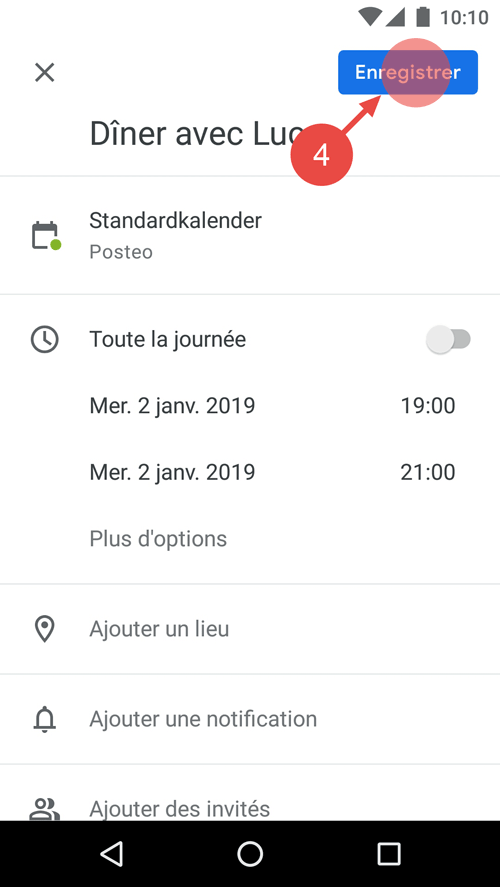
Simply select your Posteo calendar as the destination when creating an entry in the Android calendar app. All future entries will automatically be saved at Posteo. To do so, follow these steps:
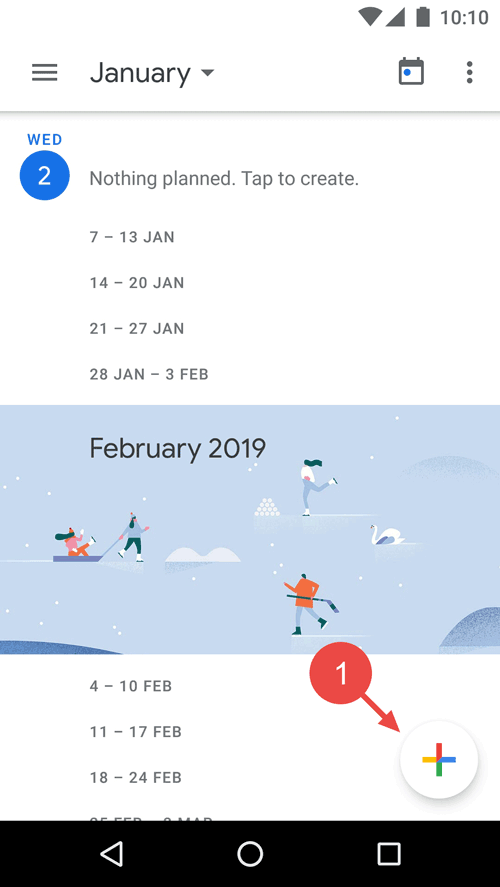
- Open the Android calendar app and click on the plus symbol to add an entry.
- Open the calendar selection underneath the title of the entry.
- Select your Posteo calendar.
- Tap on Save to save the entry.
That’s it! You have created an entry in your Posteo calendar. The entry will automatically be transferred to the Posteo server.
Tips & troubleshooting
The following tips can help identify the cause of problems on your smartphone and to solve them. Should they not help you, please contact Posteo support at support@posteo.de.
Problems when setting up or synchronising
Under certain circumstances Davx5 can not connect with the Posteo server. In such cases you will receive an error prompt when setting up or synchronising. Problems with Davx5 can be fixed by doing the following:
- Deactivate the wireless network. Verify if synchronisation can be made via your mobile internet provider.
- Deactivate anti-virus software if applicable as a test.
- Deactivate active VPN connections if applicable.
- Verify that your password has been entered in correctly.
Import your current contacts to Posteo
Address book entries of various accounts are saved separately on Android devices. Because of this, contacts that are already saved on the phone or contacts that have been synchronised with the telephone are not transferred via Davx5 to your Posteo address book.
How to import existing contacts to Posteo:
With our migration server you can import address books from many providers with a few clicks to Posteo (e.g. Gmail, web.de, Gmx, iCloud). A guide for importing address books can be found here.
Contacts that are saved locally on your telephone can be exported as a .vcf file with the help of the Android contacts app. Afterwards, you can import this file via Posteo webmail to your Posteo address book. A guide for importing can be found here.
Problems with displaying contact pictures in Davx5
It’s possible that Davx5 will not synchronise contact pictures even though these can be seen in Posteo webmail.
In this case it helps to edit the affected contact in Posteo webmail by making a small change and then saving. It’s enough, for example, to add a note or to temporarily change the email address of the contact. After saving Davx5 should update the contact picture with the next synchronisation.

