In this help article we explain how to add or remove email aliases and what you need to take note of with password resets.
How to add an email alias
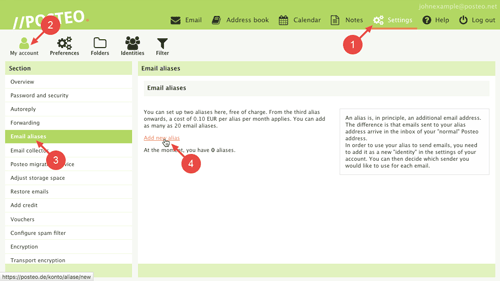
- Click Settings
- Click
- Click Email aliases (on the left)
- Create a new alias by clicking the Add new alias link
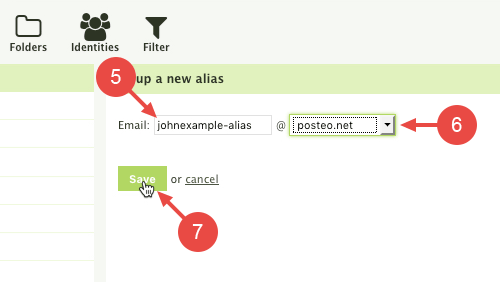
- Enter your desired address for the alias
- Select a Posteo domain
- Click Save
You have now successfully added your email alias. The address is immediately available to receive emails. If your desired address is already taken, please choose a different alias address.
How to send emails using your alias
In order to send emails with your new alias in the webmail interface, you first need to add a sender identity for your new alias.
Deleting an email alias
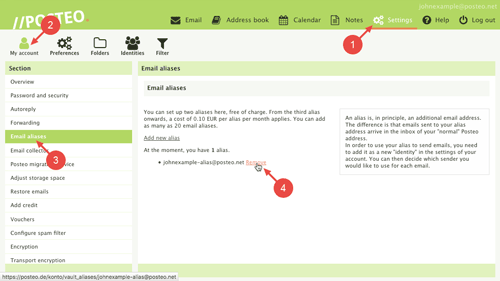
- Click Settings
- Click
- Click Email aliases
- Next to the alias, click Remove
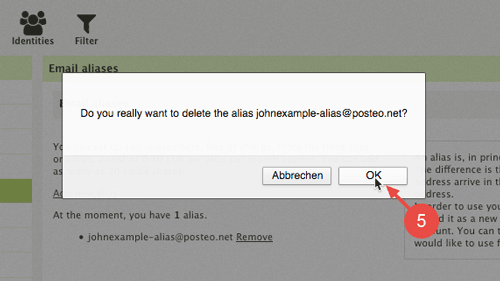
- Confirm that you really wish to remove the alias by clicking OK
Please note: The alias address is now deleted. From now on, anyone who attempts to send to this address will receive an error message. You can add the deleted alias once again at any time. It becomes available to other users after thirty six months. For security reasons, we block deleted email aliases for three years in order to minimise the risk of incorrectly delivered communications.
Tips
If you forget your password and reset it, the aliases will still work. They will, however, be displayed with encryption in the settings of your account following the password reset.
You can add as many as 20 alias addresses in the settings of your Posteo account. Two aliases are free of charge. Each additional alias costs an additional 0.10 EUR per month per address. Emails sent to your alias addresses are automatically delivered to your inbox.


