Have you added an additional email address (alias) in the settings of your email account?
For the new address, you should now set up a sender identity in the webmail interface. The sender identity is necessary for you to choose whether to send an email with your main email address or with your new alias address in the “from” field.
In this help article, we explain how to add an identity in Posteo webmail, as well as its everyday use.
Adding a new email identity
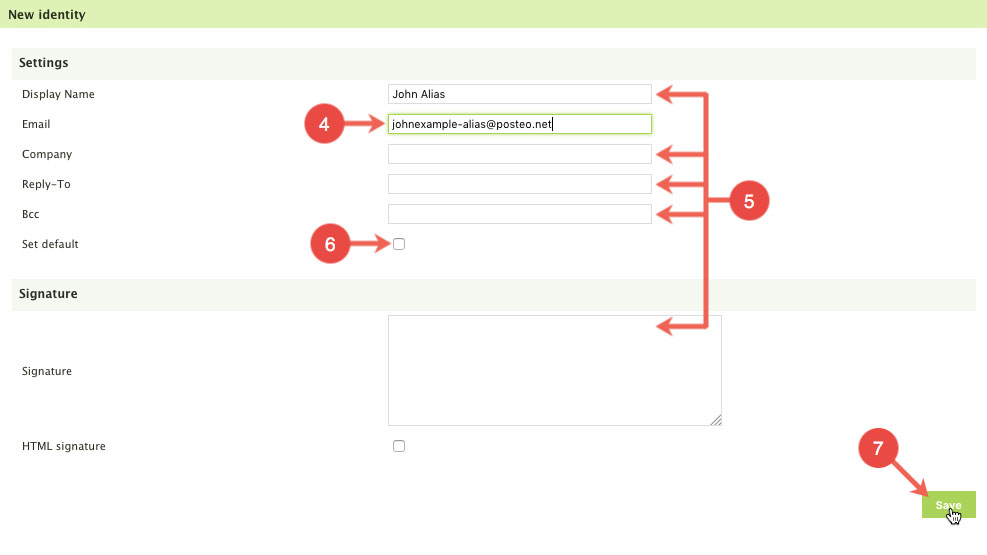
- Click Settings
- Click
- Click the symbol (at the bottom left)

- In the Email field, enter your email alias
- If you like, you can also fill out the Display Name, Organization, Reply-To , Bcc and Signature fields. These are not compulsory, however.
Tip: The recipient will see the Display Name field displayed next to your alias address. - If you would prefer to use your alias as the default address for sending, simply place a tick next to Set default
- Click Save to add the additional identity
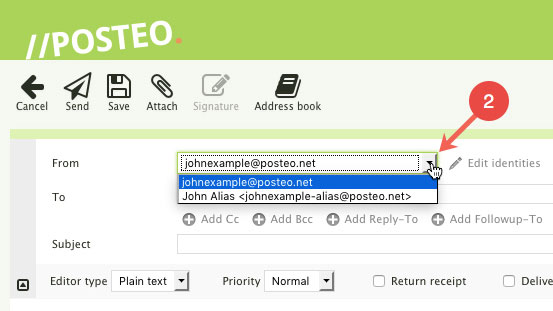
Selecting a sender
- Click to start a new email
- In the From field, click the dropdown menu to select a sender for the email
If you select your alias for the sender, only this email address will be shown to the recipient. Your main email address is not visible to the recipient of the email, not even in the email’s header.