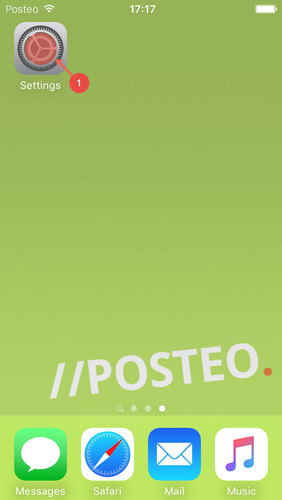
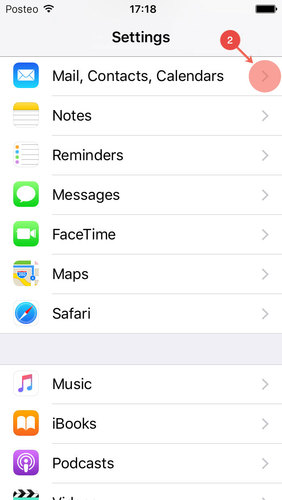
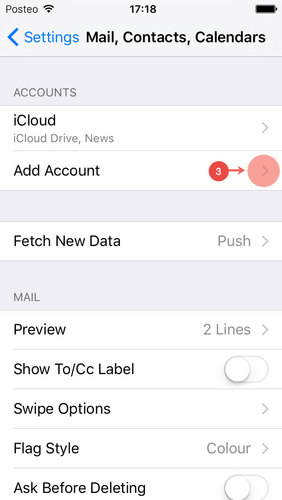
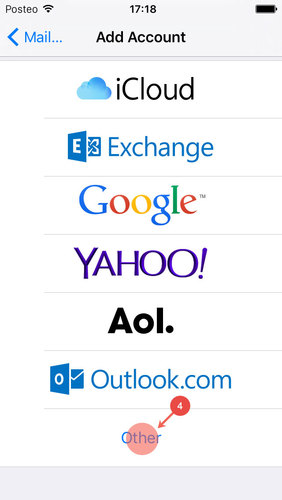
In this article, you can find out how to set up your Posteo account on your iPhone, iPad or iPod.
Automatic setup
You can set up your Posteo account automatically, by opening the following link on your iPhone or iPad (in Safari).
Configuration for set up of email account, contacts and appointments
All you need to do then is enter a username (your Posteo address) and password (your Posteo password). Just be sure to enter your username in lower case. Please also be sure to enter your full Posteo email address (john.example@posteo.net) as the username.
Your account is now set up. If you would like to delete an installed profile, you can do this via “Settings” > “General” > “Profile”
Finishing up
These finishing steps are no longer necessary for iOS 7. To complete the setup, under “Deleted emails”, choose the line “Remove”, and choose “Never”. Go back to “Account” (at the top left) and choose “Finish” (top right).
Important tip: If you wish to use aliases, this is not possible with automatic setup – please set up your account manually in this case, as described below, being careful to enter your complete Posteo email address as the username.
Configuration of email account
Manual setup
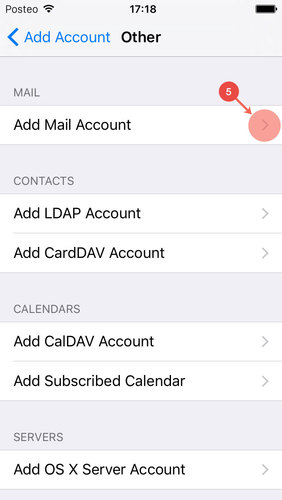
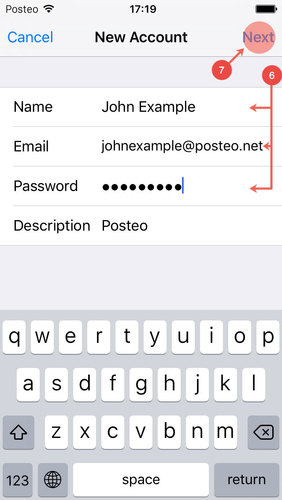
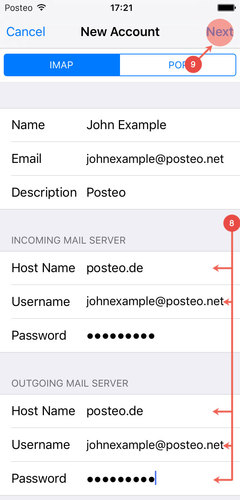
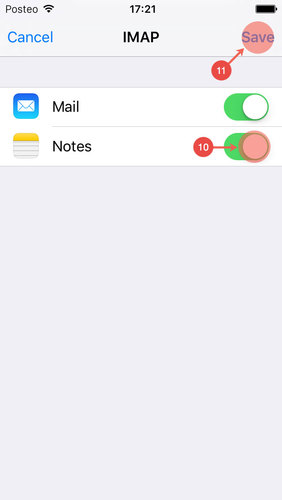
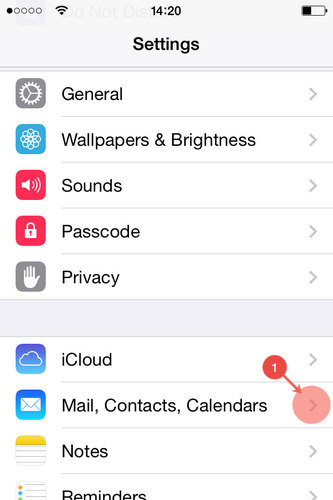
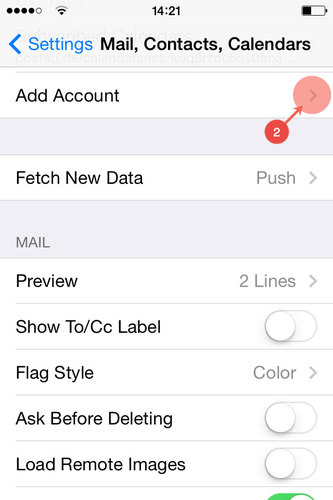
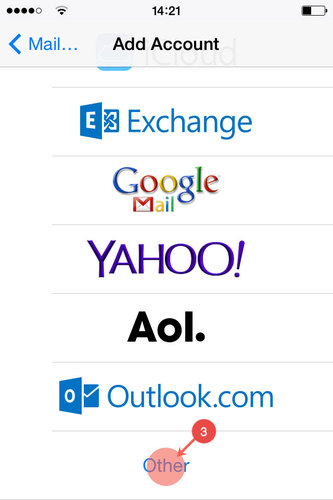
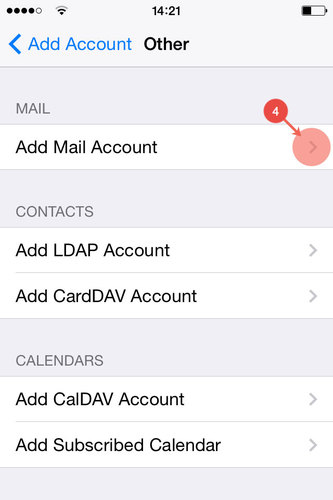
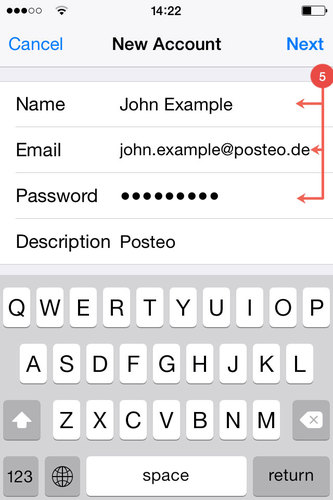
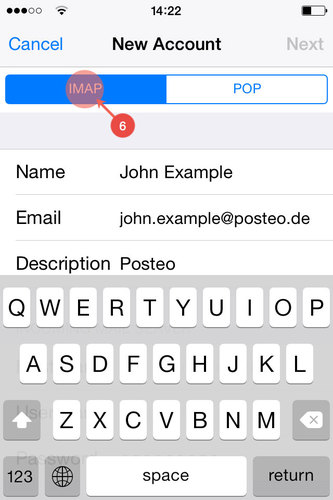
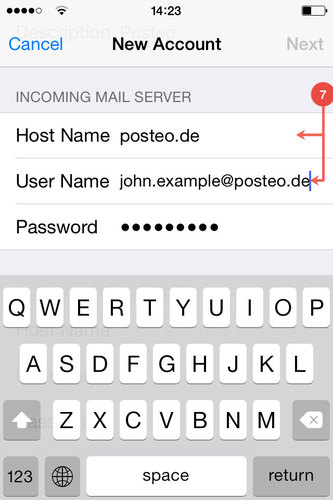
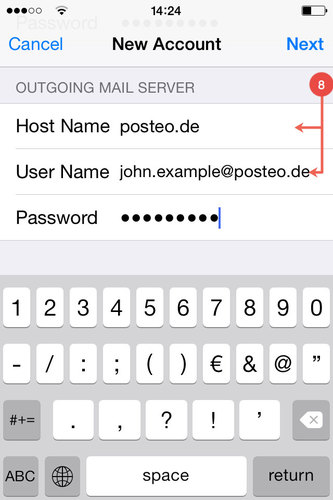
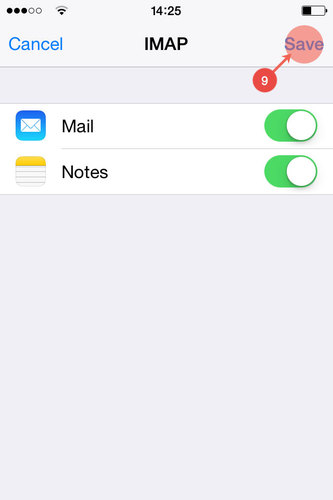
You can also set up your email account manually. For this, we have prepared a picture gallery with the necessary settings. These are screenshots from the iPhone, which should also apply on the iPad.
For iOS 8 and above
For iOS7
Finishing up
To complete the setup, under “Deleted emails”, choose the line “Remove”, and choose “Never”. Go back to “Account” (at the top left) and choose “Finish” (top right).
Email aliases
Setting up aliases is only possible from iOS 7 onwards if you have gone through manual setup. To set up an alias, please proceed as follows:
Click “Settings” > “Mail, contacts, calendars”, and select your Posteo account. Next, go into the email account of your Posteo address. Under “Account info”, tap your email address. Here you can add other email addresses.
With iOS 6, the setup process is more creative, because it is not officially provided for by Apple. Aliases can only be used with a manual set up of your account.
In fact, all you have to do is enter your alias(es) after your main address in the email settings – with a comma after each address to separate them.
Apple does not allow commas in the field where you enter your email address. Because of this, you need to copy and paste the addresses as follows:
Open the notepad app and type your addresses in the following format:
, myalias@posteo.net, myalias2@posteo.net, …
Please note the position of the comma and space before the email address. Now select the text, by holding down your finger, and copy or cut the text. Go into “Settings” > “Mail, Contacts, Calendar”. Click there on your main Posteo address, and again on the following page. You then arrive at a window with “Account info”. Click in the “Email” field. The marker for the text entry position should be blinking to the right of the existing email address. Tap and hold there until the magnifying glass appears, then lift your finger and select paste. Now the second address should be there, with a comma separating it from the first one. Above, tap “Finished”. Now you can send emails from the email program of your device, using your alias.
You can also set up further aliases using this method. You can not, however, set up multiple sender names for the one email address.

