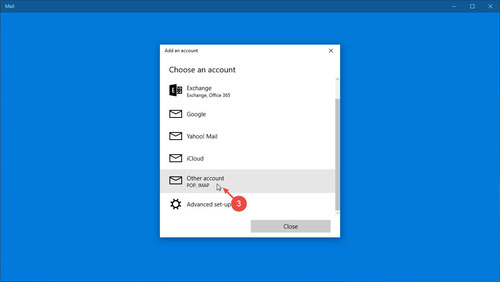
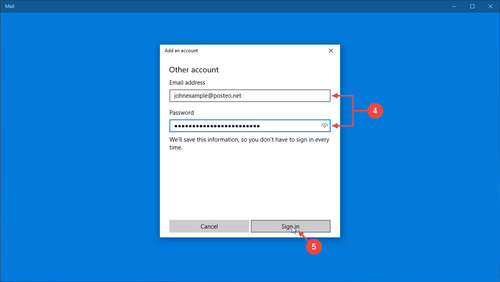
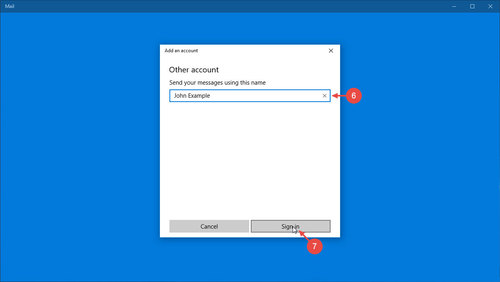
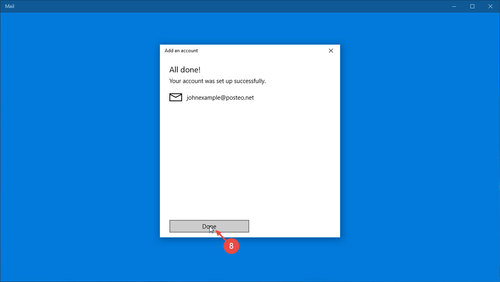
In this help article we explain how to set up Posteo (email, address book and calendar) in Windows 10 (Version 1607, Redstone 1). Instructions for older Windows 10 versions are found further below.
You can use Posteo with the standard Windows 10 apps “Mail”, “Contacts” and “Calendar”.
Windows 10 does not offer general support of open calendar and address book standards CalDAV and CardDAV. You can nonetheless set up your calendar and contacts in Windows 10. Please note the order of the setup steps in our instructions.
1. Setting up email
First, set up your Posteo email account in the Windows 10 Mail app. To do this, open the app and proceed as follows:
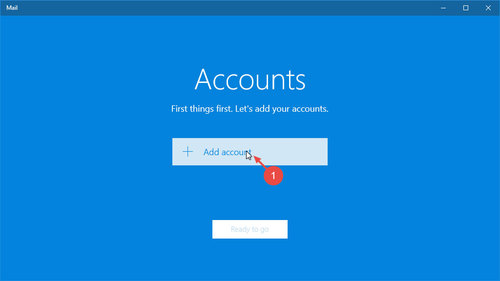
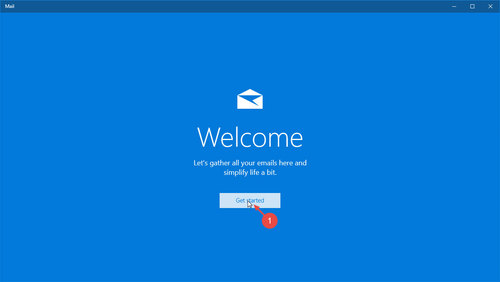
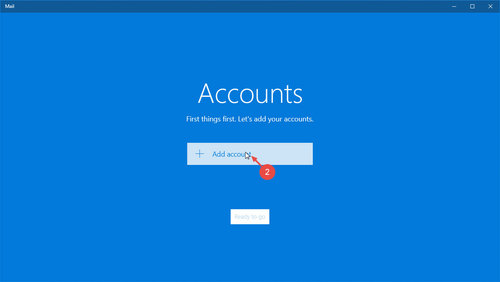
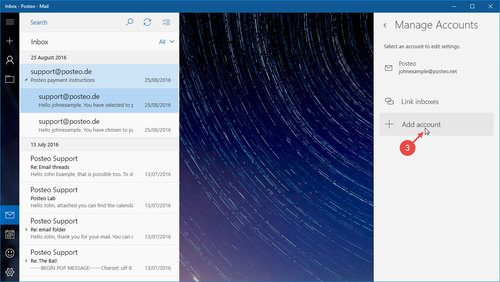
- Open Windows 10 Mail and click Add account
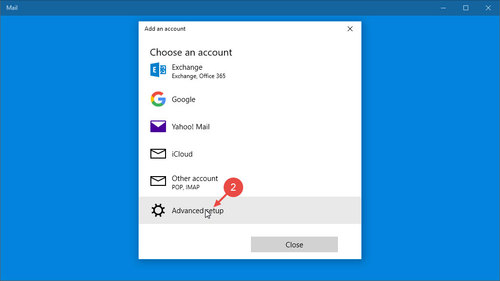
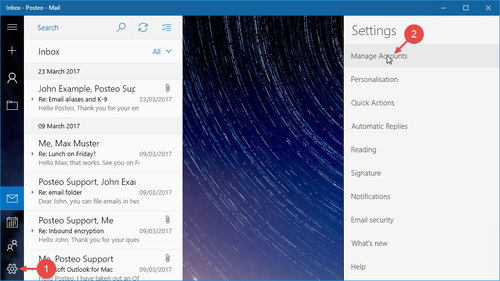
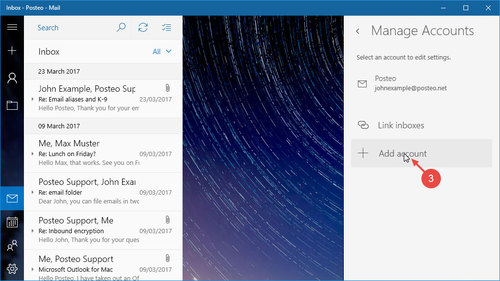
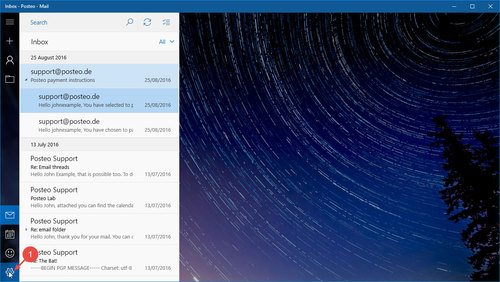
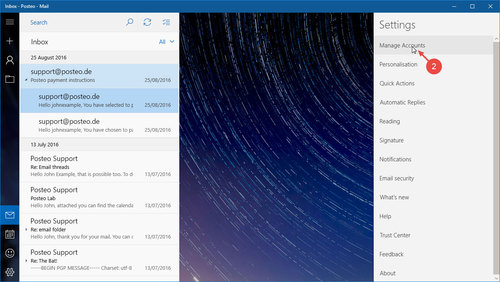
(If you already use Windows 10 Mail, you can find the button in the settings via the cog symbol (at the bottom left) and then Manage accounts). - Select Advanced setup (at the bottom of the list)
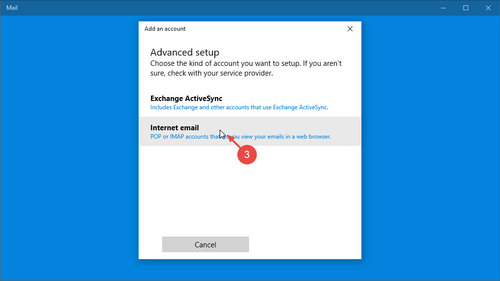
- Click Internet Email
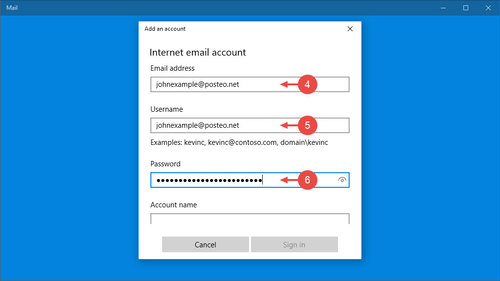
- For Email address, enter your Posteo email address
- In the Username field, also enter your Posteo email address
- Next to Password, enter your Posteo password
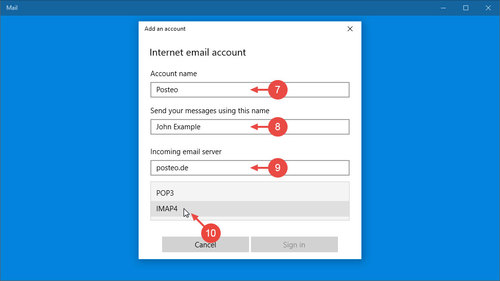
- For Account name, enter a name such as Posteo
- For Send emails with this name, enter the name with which you would like to send emails.
Tip: You do not need to enter your real name. - For the Outbound server, enter posteo.de
- For Account type, select IMAP4
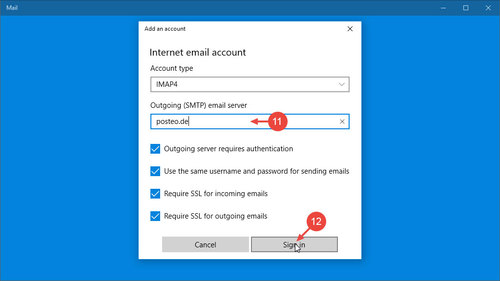
- For the Outbound server (SMTP) field, enter posteo.de
- Confirm the entries for steps 4 to 11 using Log in
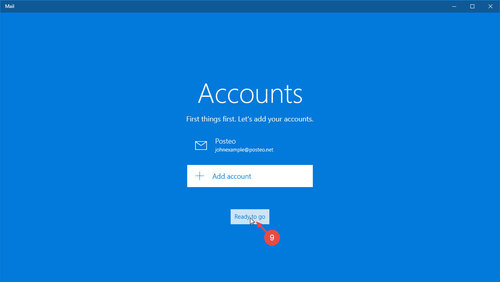
To complete the configuration, click Done. With a final click on Ready you will arrive in email view. You have now successfully set up your Posteo email in Windows 10 Mail.
In the next part you will find out how to synchronise your Posteo address book and Posteo calendar with Windows 10.
2. Setting up contacts and calendar (Posteo email account is already set up)
Open Windows 10 “Mail” and then proceed as follows:
- In Windows Mail, click the settings cog (at the bottom of the left side-menu)
- Click Manage accounts
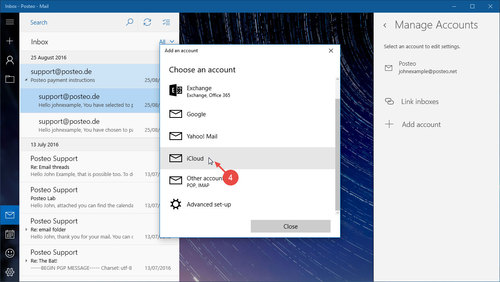
- Click Add account
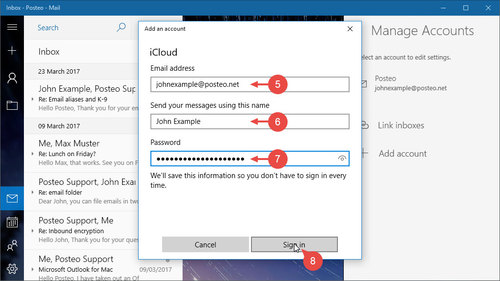
- Select iCloud
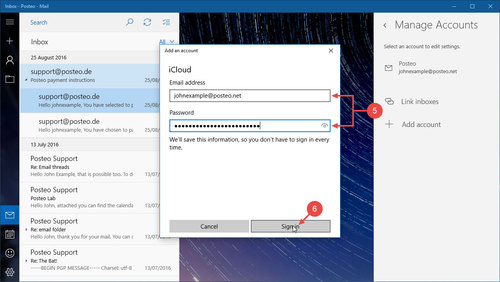
- For Email address, enter your Posteo email address
- Under Send messages with this name, enter a name.
Tip: You do not need to enter your real name - For Password, enter your Posteo password
- Confirm your entries by clicking Log in
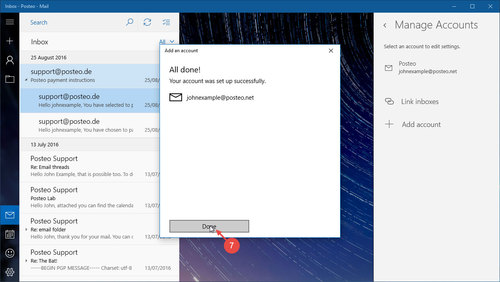
- Complete the setup by clicking Done
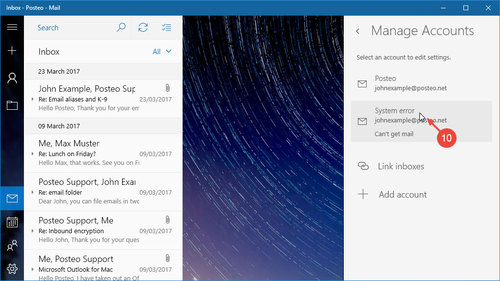
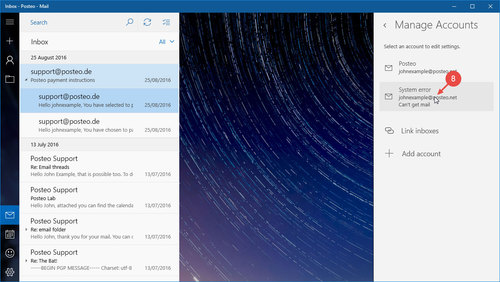
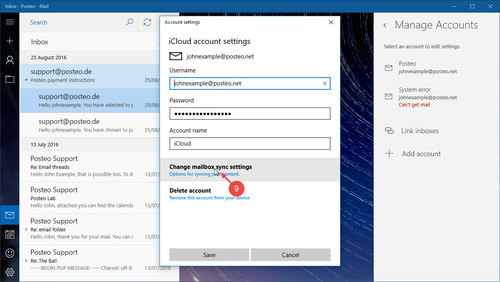
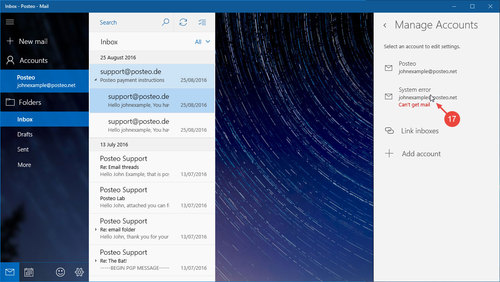
- Back in the Manage accounts menu, you will now see a system error for the iCloud account with the warning "Email can not be retrieved". Click System error
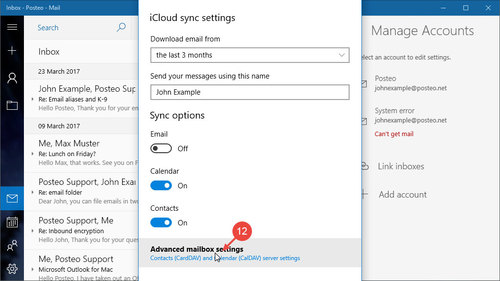
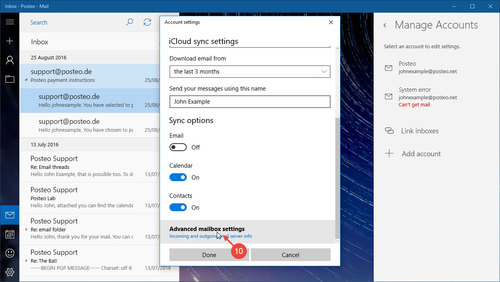
- Open Change synchronisation settings for account
- Click Advanced accounts settings
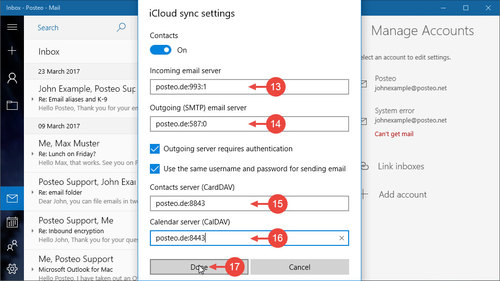
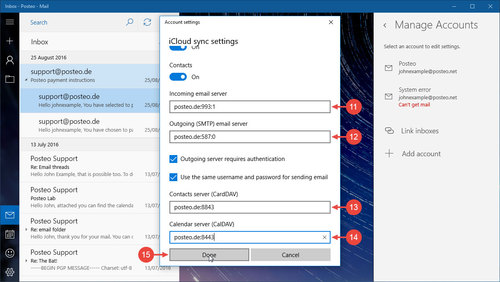
- For the inbound server, enter posteo.de:993:1
- For the outbound server, enter posteo.de:587:0
The email server entry needs to be changed so that saving the settings will work. - For contact server (CardDAV), enter posteo.de:8843
- The calendar server (CalDAV) is posteo.de:8443
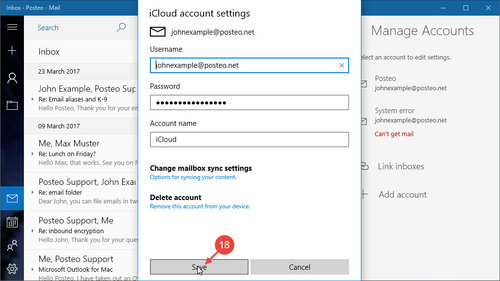
- Click Done, to save the changes
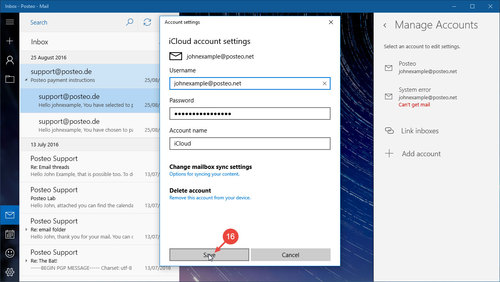
- Close the window by clicking Save
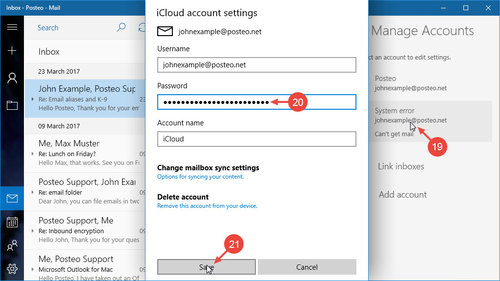
- Again click system error
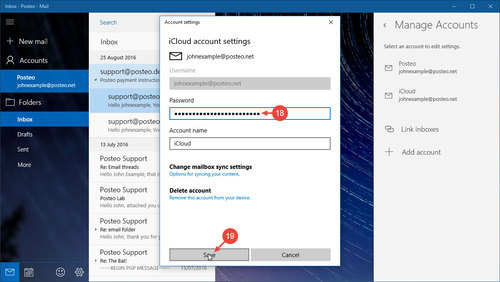
- In the Password field, enter your Posteo password once again
- Confirm your entry by clicking Save
You have now connected your Posteo calendar and address book with Windows 10. Synchronisation will now begin automatically.
Tip: If the system error does not disappear after a few seconds, repeat steps 19 to 21
Older versions
The following visual instructions show how to set up Posteo in previous versions of Windows 10.
Windows 10, version 1607 Redstone 1
Setting up email
Setting up calendar and address book synchronisation

