Have you set up your Posteo account in iOS and would now like to send emails using your email aliases?
In this help article you will find out how to add and use an alias in iOS. Please note that aliases can only be set up in iOS if you have manually configured Posteo.
How to add a new email address
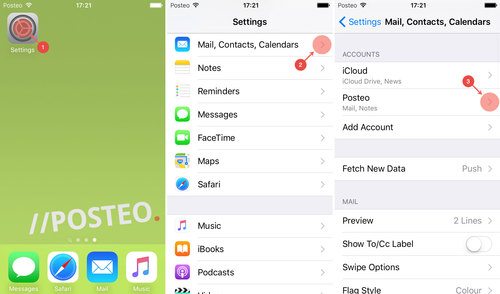
- Open the Settings
- Tap Mail, Contacts, Calendar
- Open your Posteo account
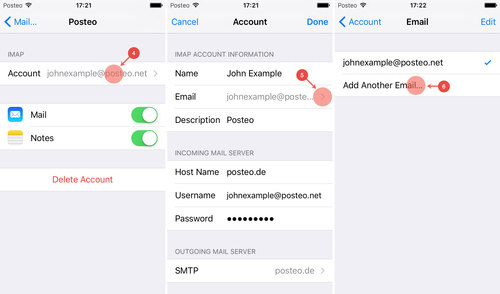
- Tap Account
- Open the Email entry
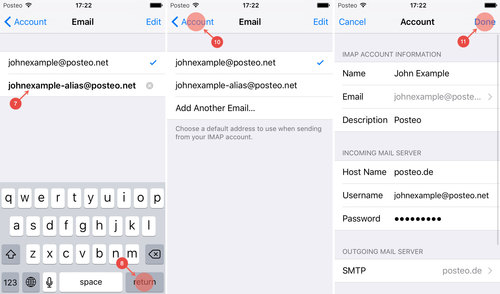
Tip: If you can not open this entry, you have presumably installed Posteo using the Posteo profile. Unfortunately, aliases can only be added in iOS after manual configuration. In order to use your alias, uninstall the Posteo profile and then set up Posteo manually. - Tap Additional email addresses
- Enter your alias address
- Confirm your entry with return
- If required, set the alias as the default for sending by tapping the address
- Tap Account
- Confirm your changes with Done
How to use your email alias as the sender address
If you have already added the alias in your Posteo account, you can now select the address as the sender address. To do this, proceed as follows:
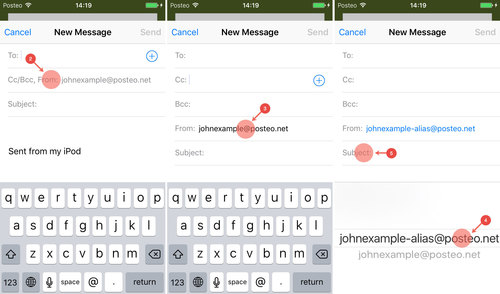
- Compose a new email
- Tap Cc/Bcc, from:
- Under Account:, tap your email address
- Select your sender address
- Confirm your selection by tapping to move to another field such as Subject:
When you select your alias as the sender address, only this email address is shown to the recipient. Your main email address is not visible to the recipient of the email, not even in the email’s header.


